Bemærk
Adgang til denne side kræver godkendelse. Du kan prøve at logge på eller ændre mapper.
Adgang til denne side kræver godkendelse. Du kan prøve at ændre mapper.
This guide provides setup steps and other actions to help you integrate GitHub Advanced Security (GHAS) and Microsoft Defender for Cloud with a use case that helps you validate the integration end to end. This integration helps maximize Microsoft's cloud-native application security by correlating runtime risks and context with the originated code for faster AI-powered remediation.
By following this guide, you:
- Set up your GitHub repository for Defender for Cloud coverage.
- Create a runtime risk factor.
- Test real use cases in Defender for Cloud.
- Link code to runtime resources.
- Start a security campaign on GitHub. This campaign uses runtime context to prioritize GHAS security alerts.
- Create GitHub issues from Defender for Cloud to start remediation.
- Close the loop between engineering and security teams.
Prerequisites
| Aspect | Details |
|---|---|
| Environmental requirements | - GitHub account with a connector created in Defender for Cloud - GitHub Advanced Security (GHAS) license on connected repositories - Defender Cloud Security Posture Management (DCSPM) plan enabled on the subscription - Microsoft Security Copilot (optional for AI-powered automated remediation) |
| Roles and permissions | - Security Admin permissions - Security Admin on the Azure subscription (to view findings in Defender for Cloud) - GitHub organization owner (for connecting repositories and configuring security campaigns) |
| Cloud environments | - Available in commercial clouds only (not in Azure Government, Azure operated by 21Vianet, or other sovereign clouds) |
Prepare your environment
Step 1: Set up the GitHub repository and run the workflow
To test the integration, use your own repositories or an example sandbox project that has a test GitHub repository with all the contents to build a vulnerable container image.
Sign in to the Azure portal.
Go to Microsoft Defender for Cloud > DevOps security.
Enter your code repo name in the search bar (Example: zava-webshop).
Validate that it really belongs to org you're monitoring (Example: zava-corporation org).
Review if there are any findings for the repo.
Ensure Advanced security status is On, indicating you have GitHub Advanced Security enabled on the monitored repo– > your onboarded repo.
If your repo not found, refer to Microsoft Defender for Cloud documentation for trouble shooting and GitHub connector onboarding.
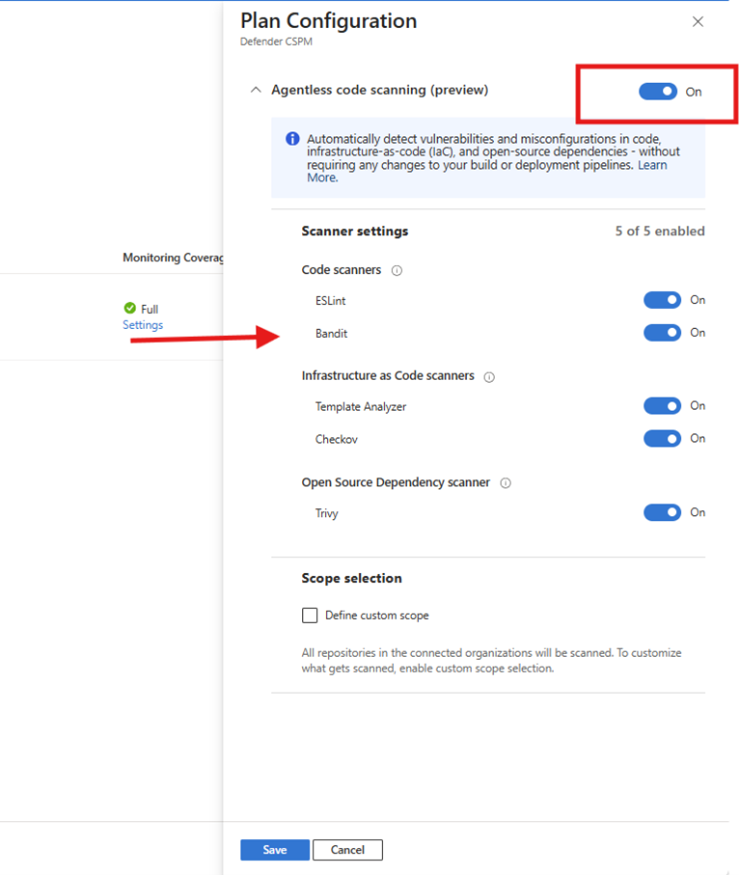
Make sure that agentless scanning is turned on for your GitHub connector.

Step 2: Validate that your environment is ready
Validation confirms that your environment is correctly configured to surface code to runtime recommendations and generate actionable results. During this step, Defender verifies that:
Full code to runtime visibility
- Microsoft Defender for Cloud continuously monitors source code repositories for security vulnerabilities.
- Build artifacts, such as container images, are scanned in container registries before deployment.
- Runtime workloads deployed to Kubernetes clusters are monitored for security risks.
- Defender for Cloud correlates and traces each artifact from code, through build and deployment, to runtime and back.
Note
It can take up to 24 hours after the previous steps are applied to see the following results.
Test that GitHub agentless scanning picks up the repository.
Go to Microsoft Defender for Cloud > Cloud Security Explorer and perform the query. The validation queries test whether Defender can identify artifacts produced by your pipelines and workloads. If the queries return results, it indicates that scanning and correlation are working as expected.

Note
If no results are returned, it may indicate that artifacts aren't yet generated, scanning isn't configured, or permissions are missing. See User roles and permissions for more information.
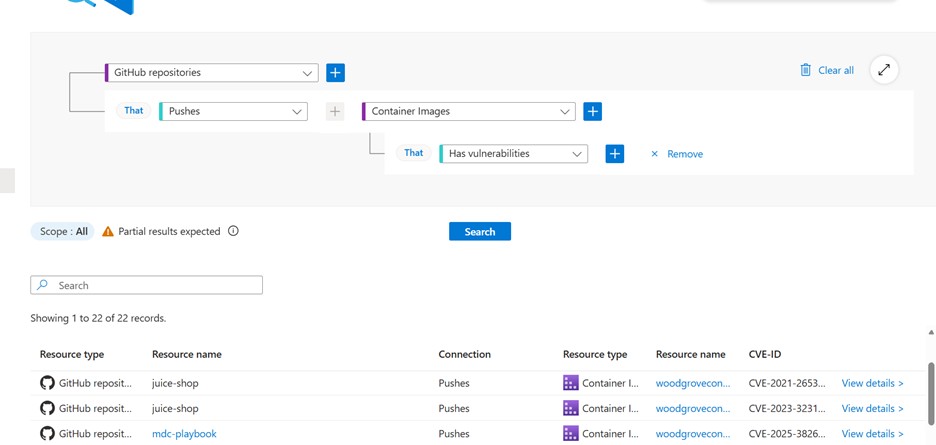
Validate that Defender for Cloud (in Azure Container Registry) scanned the container image and used it to create a container.
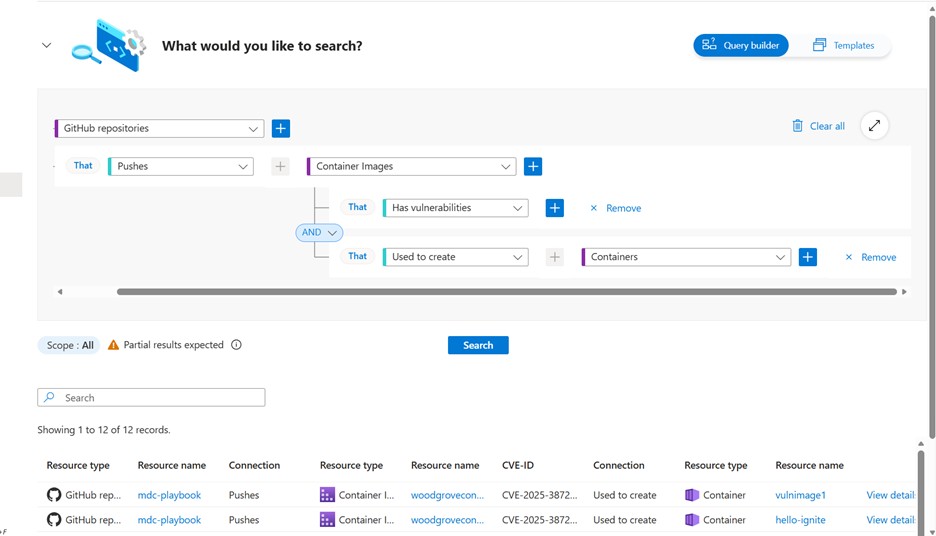
In your query, add the conditions for your specific deployment.
Validate that the container is running and that Defender for Cloud scanned the AKS cluster.
Validate that the risk factors are configured correctly on the Defender for Cloud side. Search for your container name on the Defender for Cloud inventory page, and you should see it marked as critical.


Note
This step is required only if risk factors aren't already configured in your environment. If you already use risk factors, you can verify their configuration under Settings > Resource criticality.
Successful validation ensures that subsequent steps, such as recommendations, campaigns, and GitHub issue generation, produce meaningful results.
Note
After you classify your resource as critical, it can take up to 12 hours for Defender for Cloud to send the data to GitHub. Learn more.
Step 3: Create a GitHub campaign
To create a scanning campaign, you must work at the GitHub organization level. This experience isn't available at the individual repository level.
In GitHub, go to the GitHub organization that you used for the setup testing.
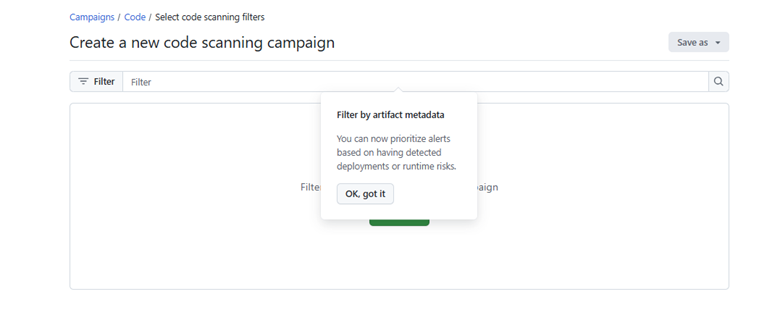
Select Security > Campaigns > Create campaign > From code scanning filters.
This campaign help prioritize GHAS findings that belong to code that is truly deployed and running.
Select Runtime Risks filters for the campaign.
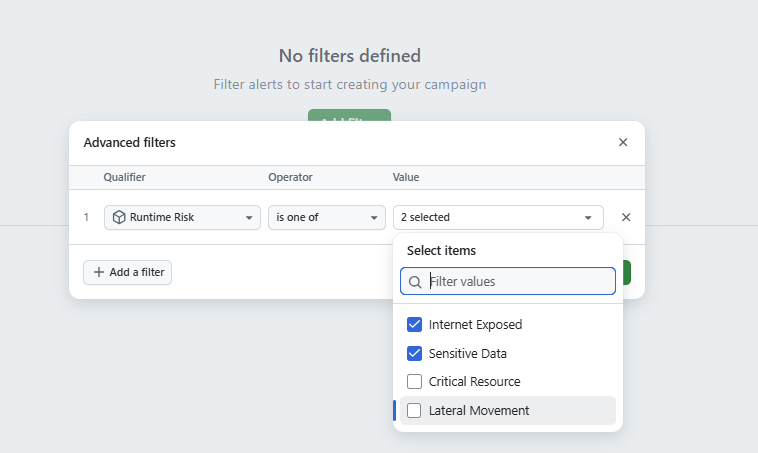
Select Save > Publish as campaign. Enter the required information and then publish the campaign.
Track campaign advancement.


Step 4: Recommendations mobilization
Use running Containers VA recommendations code-to-runtime functionality and correlation of the identified CVEs to Dependabot security alerts to understand the status of security issues. You can then assign the recommendation for resolution to the relevant engineering team based on code-to-runtime mapping.
In the Defender for Cloud portal, go to the Recommendations tab.
Search for the name of the container that you created from your code repo.
Open one of the Update software recommendations; the recommendation name begins with Update
Select the Associated CVEs tab Security alerts appear as part of the recommendation evaluation flow. These alerts provide indications about GitHub Advanced security findings that already known to the engineering. Note that some CVE IDs have a View on GitHub link in the Related GitHub Alerts column.
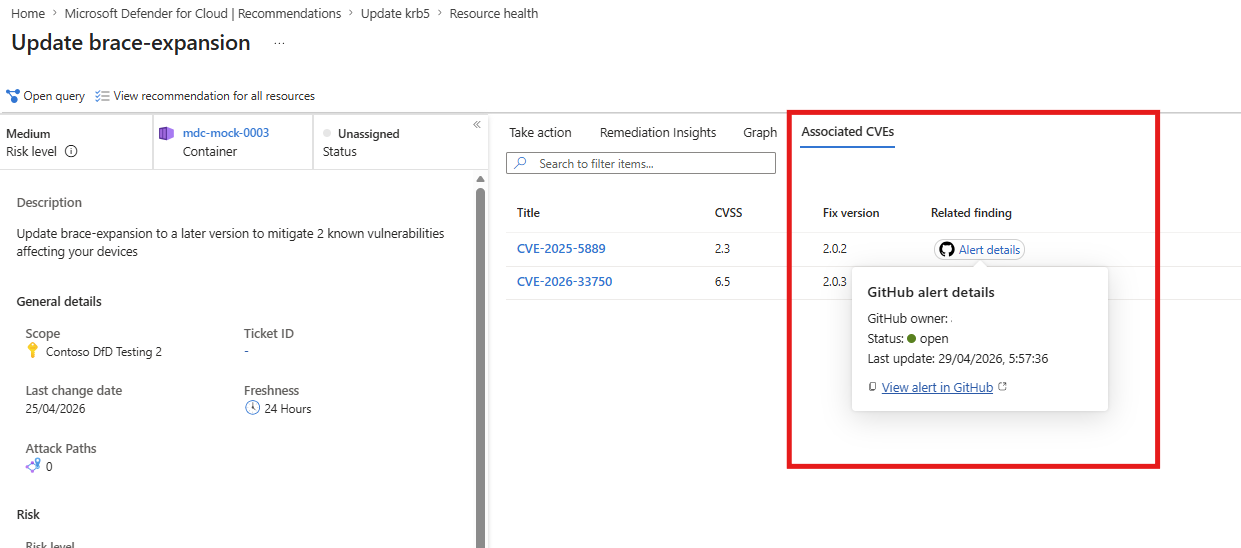

Select the link to open the relevant GHAS security alert. (To view the GHAS alert content in GitHub, you must have access permissions to the relevant GitHub repository. If you don’t have access permissions, you can always copy the link for subsequent usage or contact your GitHub administrator.)
If there's an alert enrichment, there's a matched Dependabot alert that is already known to engineering. If the status is Active, no one has fixed it yet, and the issue needs to be prioritized for a fix.
If there's no finding enrichment, this indicates a runtime risk unknown to engineering that needs to be prioritized for a fix.
What’s next? How would I know who is the relevant team for the fix? How would I know which context can help engineering with the fix?
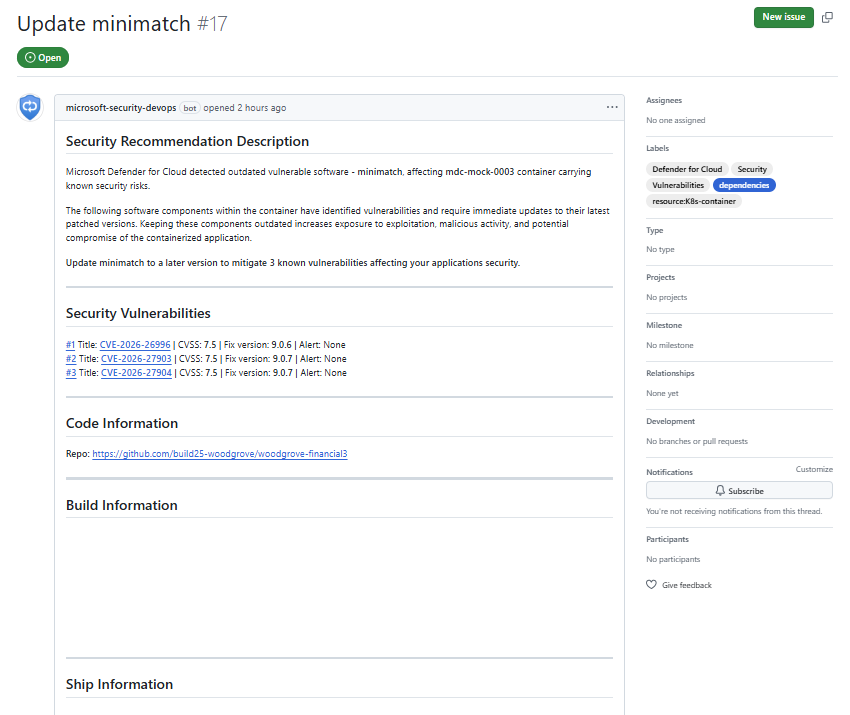
Create a GitHub issue
To close the loop between security and engineering teams, you can create a GitHub issue that prioritizes the security issues that the engineering team should focus on. This prioritization can include passing findings that GHAS didn't pick up but that Defender for Cloud detected for CVE IDs that aren't part of direct dependencies. These findings can include vulnerabilities in the base image, operating system, or software like NGINX.
The GitHub issue is automatically generated on the code repo of origin, with all the CVE IDs found in the scope of the recommendation, including other runtime and container SDLC related contexts that can help facilitate the fix and testing.
From the recommendation view, you can explicitly generate a GitHub issue to track remediation work.
Go to the Remediation Insights tab and view the code-to-runtime diagram. The diagram maps your running container to the container image in the code repository and to the code repository of origin in GitHub.
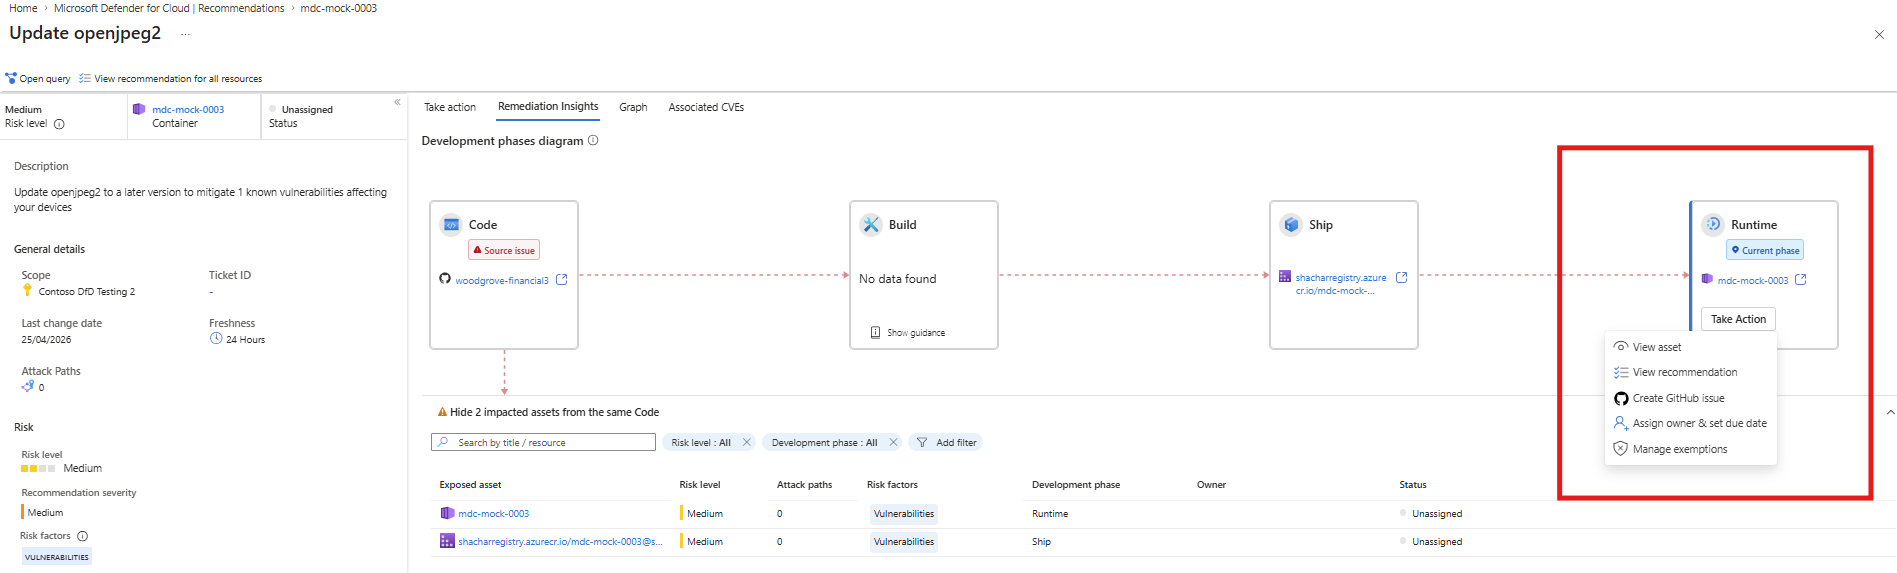
On the Remediation Insights tab review, the affected Runtime box.
Validate whether a GitHub issue already exists. If a GitHub issue already exists, a GitHub icon is displayed on the box. Hover over the icon to view issue details.
If no issue exists and you have the required permissions, you can generate a new GitHub issue. Select Take action.
Select the Generate GitHub issue option from the popup.
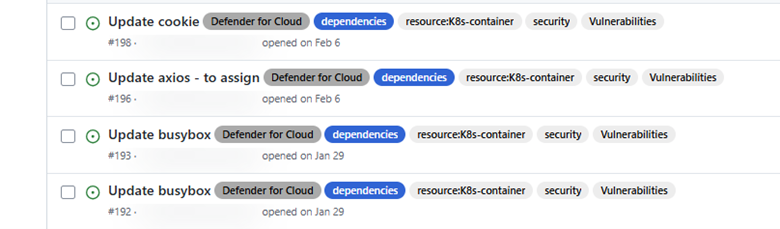
If the issue was created successfully, you'll see a popup notification with a link to the issue. The issue is created in the code repository of origin.
Note
If the Generate GitHub issue option isn't available, required GitHub or repository permissions might be missing. Contact your GitHub or repository administrator to request access.
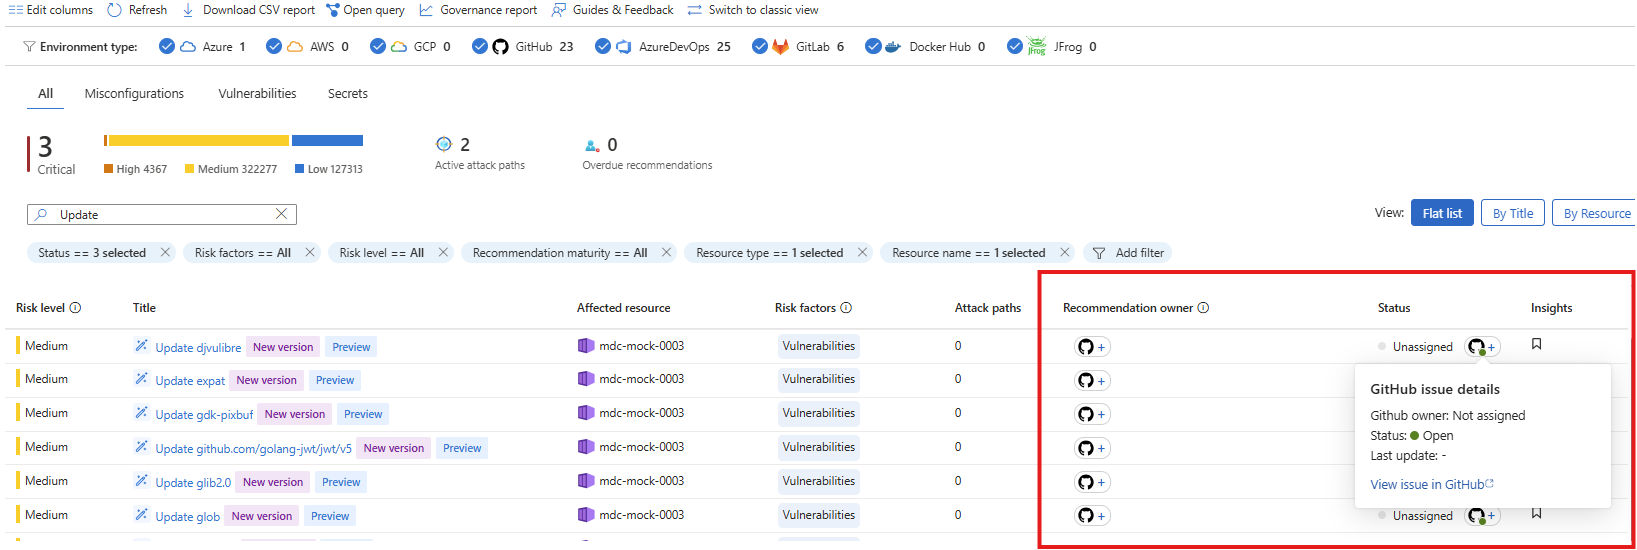
Track ownership and status updates - changes to issue status or assignment made in GitHub are reflected in Microsoft Defender for Cloud, allowing you to track ownership and remediation progress from Recommendations view.


Make agentic fixes
On the GitHub side, if you have a GitHub Copilot license, you can resolve the issue with the help of the GitHub coding agent:
- Assign a GitHub coding agent to the issue.
- Review the generated fix.
- If the fix seems reasonable, apply it.
- Observe as Defender for Cloud updates the issue status to Closed.