Merk
Tilgang til denne siden krever autorisasjon. Du kan prøve å logge på eller endre kataloger.
Tilgang til denne siden krever autorisasjon. Du kan prøve å endre kataloger.
This guide shows you how to create a C# native addon that uses Windows Machine Learning (WinML) in your Electron app. WinML allows you to run machine learning models (ONNX format) locally on Windows devices for tasks like image classification, object detection, and more.
Prerequisites
Before starting this guide, make sure you've:
- Completed the development environment setup
- Windows 11 or Windows 10 (version 1809 or later)
Note
WinML runs on any Windows 10 (1809+) or Windows 11 device. For best performance, devices with GPUs or NPUs are recommended, but the API works on CPU as well.
Important
The WinML addon requires the experimental Windows App SDK. If you selected "Stable SDKs" during winapp init in the setup guide, you'll need to update your SDK version. Edit winapp.yaml and change the Microsoft.WindowsAppSDK version to 2.0.0-experimental3, then run npx winapp restore to update.
Step 1: Create a C# Native Addon
Let's create a native addon that will use WinML APIs. We'll use a C# template that leverages node-api-dotnet to bridge JavaScript and C#.
npx winapp node create-addon --template cs --name winMlAddon
This creates a winMlAddon/ folder with:
addon.cs- Your C# code that will call WinML APIswinMlAddon.csproj- Project file with references to Windows SDK and Windows App SDKREADME.md- Documentation on how to use the addon
The command also adds a build-winMlAddon script to your package.json for building the addon, and a clean-winMlAddon script for cleaning build artifacts:
{
  "scripts": {
    "build-winMlAddon": "dotnet publish ./winMlAddon/winMlAddon.csproj -c Release",
    "clean-winMlAddon": "dotnet clean ./winMlAddon/winMlAddon.csproj"
  }
}
The template automatically includes references to both SDKs, so you can immediately start calling Windows APIs!
Let's verify everything is set up correctly by building the addon:
# Build the C# addon
npm run build-winMlAddon
Note
You can also create a C++ addon using npx winapp node create-addon (without the --template flag). C++ addons use node-addon-api and provide direct access to Windows APIs with maximum performance. See the C++ Notification Addon guide for a walkthrough or the full command documentation for more options.
Step 2: Download the SqueezeNet Model and Get Sample Code
We'll use the Classify Image sample from the AI Dev Gallery as our reference. This sample uses the SqueezeNet 1.1 model for image classification.
2.1. Download the Model
- Install the AI Dev Gallery
- Navigate to the Classify Image sample
- Download the SqueezeNet 1.1 model (it supports CPU, GPU, and NPU)
- Click Open Containing Folder to locate the
.onnxfile

- Copy the
squeezenet1.1.onnxfile to amodels/folder in your project root
Note
The model can also be downloaded directly from the ONNX Model Zoo GitHub repo
Step 3: Add Required NuGet Packages
Before adding the WinML code, we need to add additional NuGet packages required for image processing, ONNX Runtime, and GenAI support.
3.1. Update Directory.packages.props
Add the following package versions to the Directory.packages.props file in the root of your project (should have been created when you created the addon):
<Project>
  <PropertyGroup>
    <!-- Enable central package versioning -->
    <ManagePackageVersionsCentrally>true</ManagePackageVersionsCentrally>
  </PropertyGroup>
  <ItemGroup>
    <PackageVersion Include="Microsoft.JavaScript.NodeApi" Version="0.9.17" />
    <PackageVersion Include="Microsoft.JavaScript.NodeApi.Generator" Version="0.9.17" />
    <!-- Add these packages for WinML -->
+   <PackageVersion Include="Microsoft.ML.OnnxRuntime.Extensions" Version="0.14.0" />
+   <PackageVersion Include="System.Drawing.Common" Version="9.0.9" />
+   <PackageVersion Include="Microsoft.Extensions.AI" Version="9.9.1" />
+   <PackageVersion Include="Microsoft.ML.OnnxRuntimeGenAI.Managed" Version="0.10.1" />
+   <PackageVersion Include="Microsoft.ML.OnnxRuntimeGenAI.WinML" Version="0.10.1" />

    <!-- These versions may be updated automatically during restore to match yaml -->
    <PackageVersion Include="Microsoft.WindowsAppSDK" Version="2.0.0-experimental3" />
    <PackageVersion Include="Microsoft.Windows.SDK.BuildTools" Version="10.0.26100.7175" />
  </ItemGroup>
</Project>
3.2. Update winMlAddon.csproj
Open winMlAddon/winMlAddon.csproj and add the package references to the <ItemGroup>:
<ItemGroup>
  <PackageReference Include="Microsoft.JavaScript.NodeApi" />
  <PackageReference Include="Microsoft.JavaScript.NodeApi.Generator" />
  <!-- Add these packages for WinML -->
+ <PackageReference Include="Microsoft.ML.OnnxRuntime.Extensions" />
+ <PackageReference Include="System.Drawing.Common" />
+ <PackageReference Include="Microsoft.Extensions.AI" />
+ <PackageReference Include="Microsoft.ML.OnnxRuntimeGenAI.Managed" />
+ <PackageReference Include="Microsoft.ML.OnnxRuntimeGenAI.WinML" />

  <PackageReference Include="Microsoft.Windows.SDK.BuildTools" />
  <PackageReference Include="Microsoft.WindowsAppSDK" />
</ItemGroup>
What these packages do:
- Microsoft.ML.OnnxRuntime.Extensions - Provides additional operators and utilities for ONNX Runtime
- System.Drawing.Common - Enables image loading and manipulation for preprocessing
- Microsoft.Extensions.AI - AI abstractions for .NET
- Microsoft.ML.OnnxRuntimeGenAI.Managed - Managed bindings for ONNX Runtime GenAI
- Microsoft.ML.OnnxRuntimeGenAI.WinML - WinML integration for ONNX Runtime GenAI
Step 4: Add the Sample Code
The AI Dev Gallery shows the complete implementation for image classification with SqueezeNet:
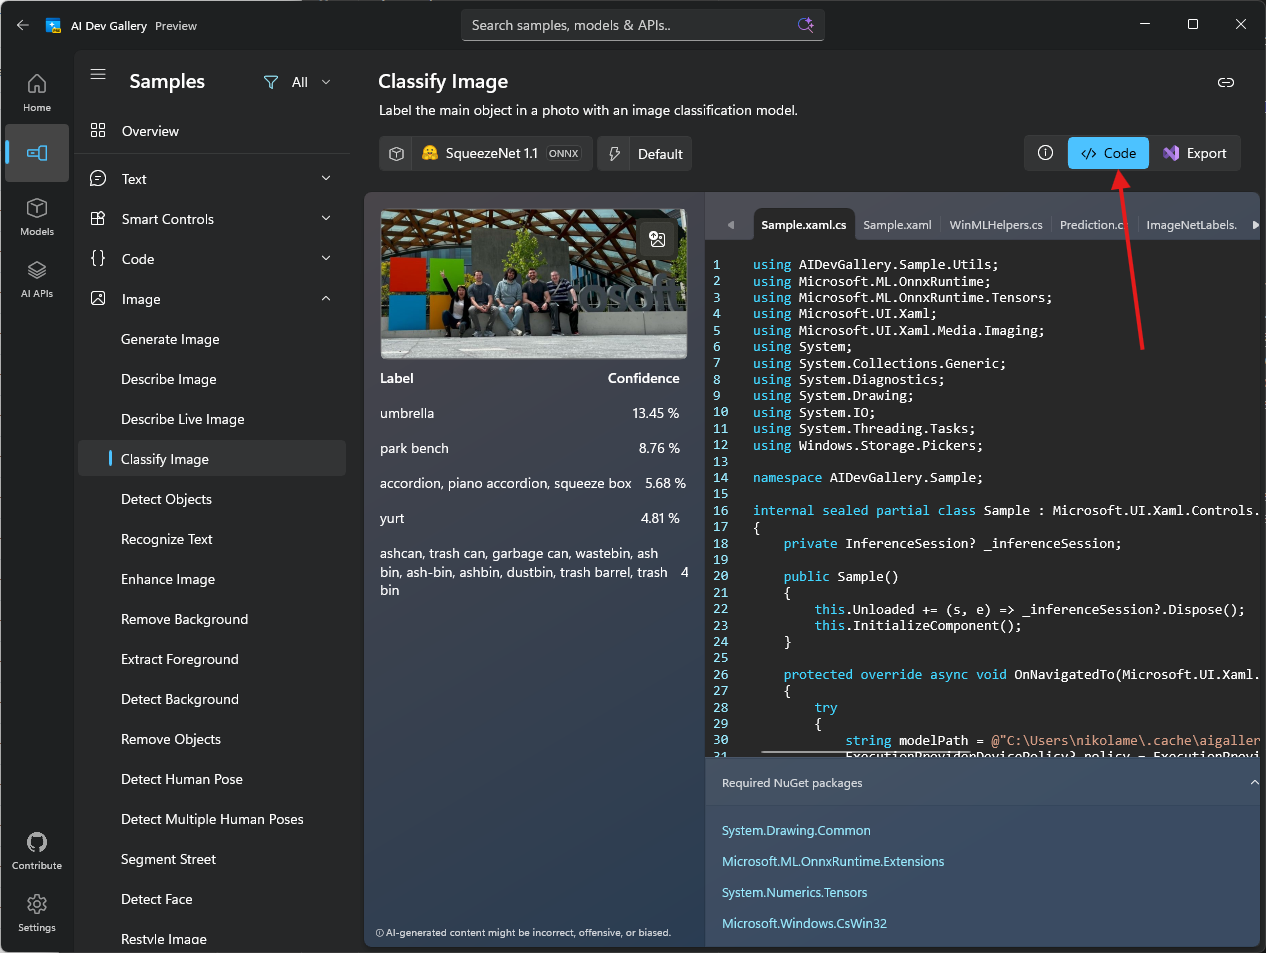
We've adapted this code for Electron and you can find the complete implementation in the electron-winml sample. The winMlAddon/ folder contains the modified code from the AI Dev Gallery.
Copy the entire winMlAddon/ folder from samples/electron-winml/winMlAddon/ to your project root, replacing the one created in Step 1. The sample includes multiple files beyond addon.cs (helper classes in Utils/, a chat client, etc.) that are required for the addon to build and run.
Important
You must copy the entire folder, not just addon.cs. The addon depends on helper files in the Utils/ subfolder (Prediction.cs, ImageNet.cs, BitmapFunctions.cs, etc.).
Key Implementation Details
Let's highlight the important parts of the implementation and key differences from the AI Dev Gallery code:
1. Project Root Path Requirement
Unlike the AI Dev Gallery code, our Electron addon requires the JavaScript code to pass the project root path. This is necessary because:
- The addon needs to locate the ONNX model file in the
models/folder - Native dependencies (DLLs) need to be loaded from specific directories
[JSExport]
public static async Task<Addon> CreateAsync(string projectRoot)
{
    if (!Path.Exists(projectRoot))
    {
        throw new Exception("Project root is invalid.");
    }

    var addon = new Addon(projectRoot);
    addon.PreloadNativeDependencies();

    string modelPath = Path.Join(projectRoot, "models", @"squeezenet1.1-7.onnx");
    await addon.InitModel(modelPath, ExecutionProviderDevicePolicy.DEFAULT, null, false, null);

    return addon;
}
This automatically selects the best execution provider (CPU, GPU, or NPU) based on device capabilities.
2. Preloading Native Dependencies
The addon includes a PreloadNativeDependencies() method to load required DLLs. This approach works for both development and production scenarios without needing to copy DLLs to the project root:
private void PreloadNativeDependencies()
{
    // Loads required DLLs from the winMlAddon build output
    // This ensures dependencies are available regardless of the execution context
}
This is called during initialization before loading the model, ensuring all native libraries are available.
3. Configuring Electron Forge for Packaging
To ensure the addon works correctly in production builds, you need to configure your packager to:
- Unpack native files - DLLs, ONNX models, and .node files must be accessible outside the ASAR archive
- Exclude unnecessary files - Keep the package size small by excluding build artifacts and temporary files
For Electron Forge, update your forge.config.js:
// From samples/electron-winml/forge.config.js
module.exports = {
  packagerConfig: {
    asar: {
      // Unpack native files so they can be accessed by the addon
      unpack: "**/*.{dll,exe,node,onnx}"
    },
    ignore: [
      // Exclude .winapp folder (SDK packages and headers)
      /^\/.winapp\//,
      // Exclude MSIX packages
      "\\.msix$",
      // Exclude winMlAddon source files, but keep the dist folder
      /^\/winMlAddon\/(?!dist).+/
    ]
  },
  // ... rest of your config
};
What this does:
asar.unpack- Extracts DLLs, executables, .node binaries, and ONNX models toapp.asar.unpacked/- This makes them accessible at runtime via file system paths
- The JavaScript code adjusts paths automatically (see the
app.asar→app.asar.unpackedreplacement above)
ignore- Excludes from the final package:.winapp/- SDK packages and headers (not needed at runtime).msixfiles - Packaged outputswinMlAddon/source files - Keeps only thedist/folder with compiled binaries
Note
If you're using a different packaging tool (electron-builder, etc.), you'll need to configure similar settings for unpacking native dependencies and excluding development files. Check your packager's documentation for ASAR unpacking options.
4. Image Classification
The ClassifyImage method processes an image and returns predictions:
[JSExport]
public async Task<Prediction[]> ClassifyImage(string imagePath)
{
    // Loads the image, preprocesses it, and runs inference
    // Returns top predictions with labels and confidence scores
}
The complete implementation handles:
- Image loading and preprocessing (resizing, normalization)
- Running the model inference
- Post-processing results to get top predictions with labels and confidence scores
Note
The full source code includes image preprocessing, tensor creation, and result parsing. Check the sample implementation for all the details.
Understanding the Code
The addon provides these main functions:
- CreateAsync - Initializes the addon and loads the SqueezeNet model
- ClassifyImage - Takes an image path and returns classification predictions
WinML automatically selects the best execution device (CPU, GPU, or NPU) based on availability.
Step 5: Build the C# Addon
Now build the addon:
npm run build-winMlAddon
This compiles your C# code using Native AOT (Ahead-of-Time compilation), which:
- Creates a
.nodebinary (native addon format) - Trims unused code for smaller bundle size
- Requires no .NET runtime on target machines
- Provides native performance
The compiled addon will be in winMlAddon/dist/winMlAddon.node.
Step 6: Test the Addon
Now let's test the addon works by calling it from the main process. Open src/main.js and follow these steps:
6.1. Load the Addon
Add the require statements at the top:
const winMlAddon = require('../winMlAddon/dist/winMlAddon.node');
6.2. Create a Test Function
Add this function to test image classification:
const testWinML = async () => {
  console.log('Testing WinML addon...');

  try {
    let projectRoot = path.join(__dirname, '..');
    // Adjust path for packaged apps
    if (projectRoot.includes('app.asar')) {
      projectRoot = projectRoot.replace('app.asar', 'app.asar.unpacked');
    }

    const addon = await winMlAddon.Addon.createAsync(projectRoot);
    console.log('Model loaded successfully!');

    // Classify a sample image
    const imagePath = path.join(projectRoot, 'test-images', 'sample.jpg');
    const predictions = await addon.classifyImage(imagePath);

    console.log('Top predictions:');
    predictions.slice(0, 5).forEach((pred, i) => {
      console.log(`${i + 1}. ${pred.label}: ${(pred.confidence * 100).toFixed(2)}%`);
    });
  } catch (error) {
    console.error('Error testing WinML:', error.message);
  }
};
Key points:
- The path adjustment (
app.asar→app.asar.unpacked) ensures the code works in both development and packaged apps - This accesses the unpacked native files configured in
forge.config.js
6.3. Call the Test Function
Add this line at the end of the createWindow() function:
testWinML();
6.4. Prepare Test Images
To test image classification:
- Create a
test-images/folder in your project root - Add a test image named
sample.jpg(the code expects this exact filename) - The SqueezeNet model recognizes 1000 different ImageNet classes (animals, objects, scenes, etc.)
When you run the app, you'll see the classification results in the console!
Tip
For a complete implementation with IPC handlers, file selection dialogs, and a UI, see the electron-winml sample.
Step 7: Update Debug Identity
To ensure the Windows App SDK is loaded and available for usage, we need to ensure we setup debug identity which will ensure the framework is loaded whenever our app runs. Likewise, whenever you modify Package.appxmanifest or change assets referenced in the manifest (like app icons), you need to update your app's debug identity. Run:
npx winapp node add-electron-debug-identity
This command:
- Reads your
Package.appxmanifestto get app details and capabilities - Registers
electron.exein yournode_moduleswith a temporary identity - Enables you to test identity-required APIs without full MSIX packaging
Note
This command is already part of the postinstall script we added in the setup guide, so it runs automatically after npm install. However, you need to run it manually whenever you:
- Modify
Package.appxmanifest(change capabilities, identity, or properties) - Update app assets (icons, logos, etc.)
Now run your app:
npm start
Check the console output - you should see the WinML test results!
⚠️ Known Issue: App Crashes or Blank Window (click to expand)
There is a known Windows bug with sparse packaging Electron applications which causes the app to crash on start or not render web content. The issue has been fixed in Windows but has not yet propagated to all devices.
See development environment setup for workaround.
Next Steps
Congratulations! You've successfully created a native addon that can run machine learning models with WinML! 🎉
Now you're ready to:
- Package Your App for Distribution - Create an MSIX package that you can distribute
Or explore other guides:
- Creating a Phi Silica Addon - Learn how to use the Phi Silica AI API
- Getting Started Overview - Return to the main guide
Customizing for Your Model
To fully integrate your ONNX model, you'll need to:
- Understand your model's inputs - Images, tensors, sequences, etc.
- Create proper input bindings - Convert your data to the format WinML expects
- Process the outputs - Parse and interpret the model's predictions
- Handle errors gracefully - Model loading and inference can fail
Additional Resources
- WinML Documentation - Official WinML documentation
- winapp CLI Documentation - Full CLI reference
- Sample Electron App - Complete working example
- AI Dev Gallery - Sample gallery of all AI APIs
- Windows App SDK Samples - Collection of Windows App SDK samples
- node-api-dotnet - C# ↔ JavaScript interop library
Troubleshooting
Build fails with NU1010: PackageReference items do not define a corresponding PackageVersion
Ensure all packages referenced in winMlAddon.csproj have matching entries in Directory.packages.props. See Step 3 for the complete list of required packages.
"not a valid Win32 application" when loading the addon
This means the addon was built for a different architecture than your Node.js/Electron runtime. Check your Node.js architecture:
node -e "console.log(process.arch)"
Then rebuild the addon with the matching target:
# For x64 Node.js:
dotnet publish ./winMlAddon/winMlAddon.csproj -c Release -r win-x64

# For ARM64 Node.js:
dotnet publish ./winMlAddon/winMlAddon.csproj -c Release -r win-arm64
If you recently changed your Node.js installation, also reinstall node_modules to get the matching Electron binary:
rm -rf node_modules package-lock.json
npm install
Get Help
- Found a bug? File an issue
- WinML questions? Check the WinML documentation
Happy machine learning! 🤖
Samarbeid med oss på GitHub
Du finner kilden for dette innholdet på GitHub. Der du også kan opprette og se gjennom problemer og pull-forespørsler. Hvis du vil ha mer informasjon, kan du se vår bidragsyterveiledning.

Windows developer