Nota
L'accesso a questa pagina richiede l'autorizzazione. È possibile provare ad accedere o modificare le directory.
L'accesso a questa pagina richiede l'autorizzazione. È possibile provare a modificare le directory.
Importante
Questa funzionalità di Servizi di comunicazione di Azure è attualmente in anteprima. Le funzionalità in anteprima sono disponibili pubblicamente e possono essere usate da tutti i clienti Microsoft nuovi ed esistenti.
Le anteprime di API e SDK vengono fornite senza un contratto di servizio. È consigliabile non usarle per carichi di lavoro di produzione. Alcune funzionalità potrebbero non essere supportate o potrebbero essere vincolate.
Per altre informazioni, vedere le Condizioni supplementari per l'uso delle anteprime di Microsoft Azure.
In questa esercitazione si usa Servizi di comunicazione di Azure con la libreria dell'interfaccia utente per creare un'esperienza che consente agli utenti di partecipare a una chiamata. La libreria dell'interfaccia utente offre un set di componenti avanzati e controlli dell'interfaccia utente che possono essere usati per produrre un'esperienza di preparazione delle chiamate e un set completo di API per comprendere lo stato utente.
Prerequisiti
- Seguire il processo di configurazione dell'app nella parte precedente di questa esercitazione: Preparazione delle chiamate - Panoramica
Scaricare il codice
Accedere al codice completo per questa esercitazione su GitHub.
Verifica del supporto del browser
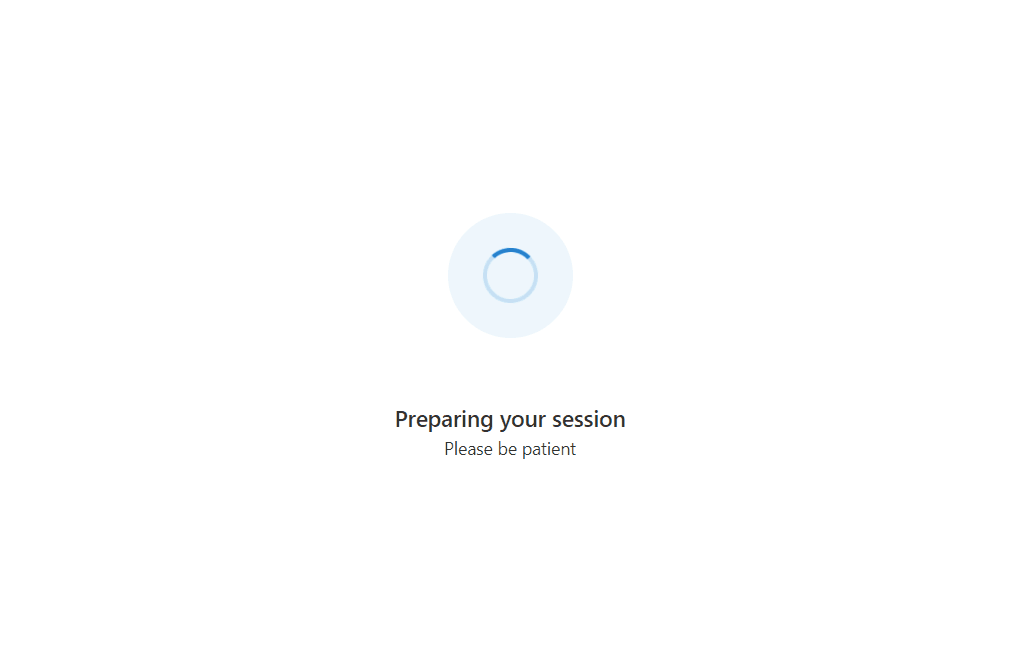
Per garantire che l'utente ottenga l'esperienza migliore, è necessario prima assicurarsi che si trova in un browser supportato. In questa sezione viene creata una pagina che visualizza "Preparazione della sessione" mentre viene eseguita una rapida verifica del supporto in background nel browser dell'utente.
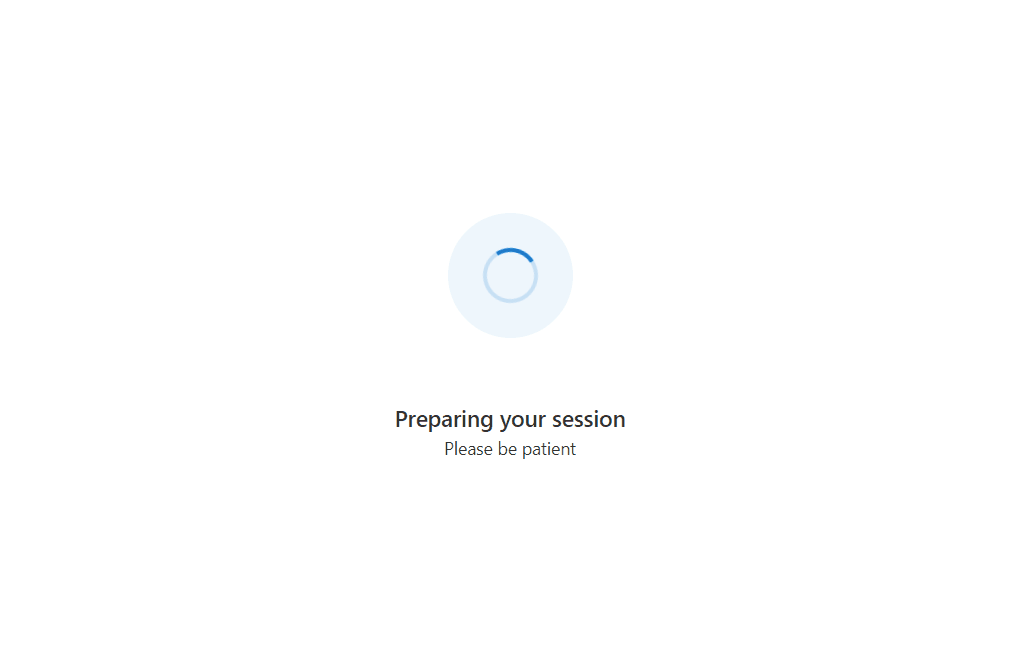
Preparazione della pagina di sessione
Creare un nuovo file denominato PreparingYourSession.tsx in cui viene creato uno spinner da visualizzare all'utente durante l'esecuzione di controlli asincroni in background:
src/PreparingYourSession.tsx
import { useTheme } from '@azure/communication-react';
import { ISpinnerStyles, IStackStyles, ITextStyles, ITheme, Spinner, Stack, Text } from '@fluentui/react';

/** This page displays a spinner to the user. This is used to show the user that background checks are being performed. */
export const PreparingYourSession = (): JSX.Element => {
  const theme = useTheme();
  return (
    <Stack verticalFill verticalAlign="center" horizontalAlign="center" tokens={{ childrenGap: '3rem' }}>
      <Stack styles={spinnerContainerStyles(theme)}>
        <Spinner styles={spinnerStyles} />
      </Stack>
      <Stack horizontalAlign="center">
        <Text styles={headingStyles} variant="large">Preparing your session</Text>
        <Text variant="medium">Please be patient</Text>
      </Stack>
    </Stack>
  );
};

const headingStyles: ITextStyles = {
  root: {
    fontWeight: '600',
    lineHeight: '2rem'
  }
};

const spinnerStyles: ISpinnerStyles = {
  circle: {
    height: '2.75rem',
    width: '2.75rem',
    borderWidth: '0.2rem'
  }
};

const spinnerContainerStyles = (theme: ITheme): IStackStyles => ({
  root: {
    padding: '1.75rem',
    borderRadius: '50%',
    background: theme.palette?.themeLighterAlt
  }
});
È quindi possibile associare questa schermata preparazione della sessione nell'app.
In App.tsx e una variabile testState per tenere traccia dello stato dell'applicazione, e mentre testState è nello stato runningEnvironmentChecks, viene visualizzata la schermata di preparazione della sessione.
Aggiungere prima di tutto le importazioni seguenti al App.tsx file creato nella panoramica:
import { useState } from 'react';
import { PreparingYourSession } from './PreparingYourSession';
Al termine, aggiornare il App.tsx file in modo da includere il nuovo spinner.
type TestingState = 'runningEnvironmentChecks' | 'finished';

const App = (): JSX.Element => {
  const [testState, setTestState] = useState<TestingState>('runningEnvironmentChecks');

  return (
    <FluentThemeProvider>
      <CallClientProvider callClient={callClient}>
        {/* Show a Preparing your session screen while running the call readiness checks */}
        {testState === 'runningEnvironmentChecks' && (
          <>
            <PreparingYourSession />
          </>
        )}

        {/* After the device setup is complete, take the user to the call. For this sample we show a test complete page. */}
        {testState === 'finished' && <TestComplete />}
      </CallClientProvider>
    </FluentThemeProvider>
  );
}
Esecuzione di un controllo delle informazioni sull'ambiente
Creare prima di tutto una chiamata environmentSupportUtils.tsal file di utilità . All'interno di questa chiamata viene aggiunto un metodo checkEnvironmentSupport. Questo metodo usa il client con stato chiamante per eseguire una richiesta di informazioni sull'ambiente su cui è in esecuzione il client con stato chiamante.
src/environmentSupportUtils.ts
import { Features, EnvironmentInfo } from "@azure/communication-calling";
import { StatefulCallClient } from "@azure/communication-react";

/** Use the CallClient's getEnvironmentInfo() method to check if the browser is supported. */
export const checkEnvironmentSupport = async (callClient: StatefulCallClient): Promise<EnvironmentInfo> => {
  const environmentInfo = await callClient.feature(Features.DebugInfo).getEnvironmentInfo();
  console.info(environmentInfo); // view console logs in the browser to see what environment info is returned
  return environmentInfo;
}
I dati restituiti da checkEnvironmentSupport contengono le informazioni seguenti:
- Supporto del browser
- Supporto della versione browser
- Supporto del sistema operativo (piattaforma)
- Informazioni dettagliate sull'ambiente
Informare l'utente che si trovano in un browser non supportato
A questo punto, è necessario usare queste informazioni fornite da Calling SDK per informare l'utente dello stato del proprio ambiente in caso di problemi. La libreria dell'interfaccia utente fornisce tre componenti diversi per soddisfare questo scopo a seconda del problema.
UnsupportedOperatingSystemUnsupportedBrowserUnsupportedBrowserVersion
Si inizia ospitando i componenti della libreria dell'interfaccia utente all'interno di un oggetto FluentUI Modal: Creare un nuovo file denominato UnsupportedEnvironmentPrompts.tsx in cui vengono create le diverse richieste:
src/UnsupportedEnvironmentPrompts.tsx
import { UnsupportedOperatingSystem, UnsupportedBrowser, UnsupportedBrowserVersion } from '@azure/communication-react';
import { Modal } from '@fluentui/react';

/**
 * Modal dialog that shows a Browser Version Unsupported Prompt
 * Use the `onTroubleShootingClick` argument to redirect the user to further troubleshooting.
 * Use the `onContinueAnywayClick` argument to allow the user to continue to the next step even though they are on an unsupported browser version.
 */
export const BrowserVersionUnsupportedPrompt = (props: { isOpen: boolean, onContinueAnyway:() => void }): JSX.    Element => (
  <Modal isOpen={props.isOpen}>
    <UnsupportedBrowserVersion
      onTroubleshootingClick={() => alert('This callback should be used to take the user to further troubleshooting')}
      onContinueAnywayClick={() => props.onContinueAnyway()}
    />
  </Modal>
);

/**
 * Modal dialog that shows a Browser Unsupported Prompt
 * Use the `onTroubleShootingClick` argument to redirect the user to further troubleshooting.
 */
export const BrowserUnsupportedPrompt = (props: { isOpen: boolean }): JSX.Element => (
  <Modal isOpen={props.isOpen}>
    <UnsupportedBrowser
      onTroubleshootingClick={() => alert('This callback should be used to take the user to further troubleshooting')}
    />
  </Modal>
);

/**
 * Modal dialog that shows an Operating System Unsupported Prompt
 * Use the `onTroubleShootingClick` argument to redirect the user to further troubleshooting.
 */
export const OperatingSystemUnsupportedPrompt = (props: { isOpen: boolean }): JSX.Element => (
  <Modal isOpen={props.isOpen}>
    <UnsupportedOperatingSystem
      onTroubleshootingClick={() => alert('This callback should be used to take the user to further troubleshooting')}
    />
  </Modal>
);
È quindi possibile visualizzare queste richieste in un componente controllo dell'ambiente.
Creare un file denominato EnvironmentChecksComponent.tsx che contiene la logica per visualizzare questo prompt: questo componente ha un callback onTestsSuccessful che può portare l'utente alla pagina successiva nell'app.
src/EnvironmentChecksComponent.tsx
import { useEffect, useState } from 'react';
import { BrowserUnsupportedPrompt, BrowserVersionUnsupportedPrompt, OperatingSystemUnsupportedPrompt } from './UnsupportedEnvironmentPrompts';
import { useCallClient } from '@azure/communication-react';
import { checkEnvironmentSupport } from './environmentSupportUtils';

export type EnvironmentChecksState = 'runningEnvironmentChecks' |
  'operatingSystemUnsupported' |
  'browserUnsupported' |
  'browserVersionUnsupported';

/**
 * This component is a demo of how to use the StatefulCallClient with CallReadiness Components to get a user
 * ready to join a call.
 * This component checks the browser support.
 */
export const EnvironmentChecksComponent = (props: {
  /**
   * Callback triggered when the tests are complete and successful
   */
  onTestsSuccessful: () => void
}): JSX.Element => {
  const [currentCheckState, setCurrentCheckState] = useState<EnvironmentChecksState>('runningEnvironmentChecks');


  // Run call readiness checks when component mounts
  const callClient = useCallClient();
  useEffect(() => {
    const runEnvironmentChecks = async (): Promise<void> => {

      // First we get the environment information from the calling SDK.
      const environmentInfo = await checkEnvironmentSupport(callClient);

      if (!environmentInfo.isSupportedPlatform) {
        setCurrentCheckState('operatingSystemUnsupported');
        // If the platform or operating system is not supported we stop here and display a modal to the user.
        return;
      } else if (!environmentInfo.isSupportedBrowser) {
        setCurrentCheckState('browserUnsupported');
        // If browser support fails, we stop here and display a modal to the user.
        return;
      } else if (!environmentInfo.isSupportedBrowserVersion) {
        setCurrentCheckState('browserVersionUnsupported');
        /**
         *  If the browser version is unsupported, we stop here and show a modal that can allow the user
         *  to continue into the call.
         */
        return;
      } else {
        props.onTestsSuccessful();
      }
    };

    runEnvironmentChecks();
    // eslint-disable-next-line react-hooks/exhaustive-deps
  }, []);

  return (
    <>
      {/* We show this when the operating system is unsupported */}
      <OperatingSystemUnsupportedPrompt isOpen={currentCheckState === 'operatingSystemUnsupported'} />

      {/* We show this when the browser is unsupported */}
      <BrowserUnsupportedPrompt isOpen={currentCheckState === 'browserUnsupported'} />

      {/* We show this when the browser version is unsupported */}
      <BrowserVersionUnsupportedPrompt isOpen={currentCheckState === 'browserVersionUnsupported'} onContinueAnyway={props.onTestsSuccessful} />
    </>
  );
}
È quindi possibile aggiungere l'oggetto EnvironmentChecksComponent a App.tsx. L'app sposta quindi l'utente nella fase Controlli dispositivo dopo che il test ha avuto esito positivo usando il onTestsSuccessful callback:
Ora importiamo il nuovo componente nell'app in App.tsx
import { EnvironmentChecksComponent } from './EnvironmentChecksComponent';
Quindi aggiorniamo il componente App in App.tsx:
const App = (): JSX.Element => {
  const [testState, setTestState] = useState<TestingState>('runningEnvironmentChecks');

  return (
    <FluentThemeProvider>
      <CallClientProvider callClient={callClient}>
        {/* Show a Preparing your session screen while running the call readiness checks */}
        {testState === 'runningEnvironmentChecks' && (
          <>
            <PreparingYourSession />
            <EnvironmentChecksComponent
              onTestsSuccessful={() => setTestState('finished')}
            />
          </>
        )}

        {/* After the device setup is complete, take the user to the call. For this sample we show a test complete page. */}
        {testState === 'finished' && <TestComplete />}
      </CallClientProvider>
    </FluentThemeProvider>
  );
}
È ora possibile eseguire l'app. Provare a eseguire in un browser non supportato e viene visualizzato il prompt del browser non supportato: