Remarque
L’accès à cette page nécessite une autorisation. Vous pouvez essayer de vous connecter ou de modifier des répertoires.
L’accès à cette page nécessite une autorisation. Vous pouvez essayer de modifier des répertoires.
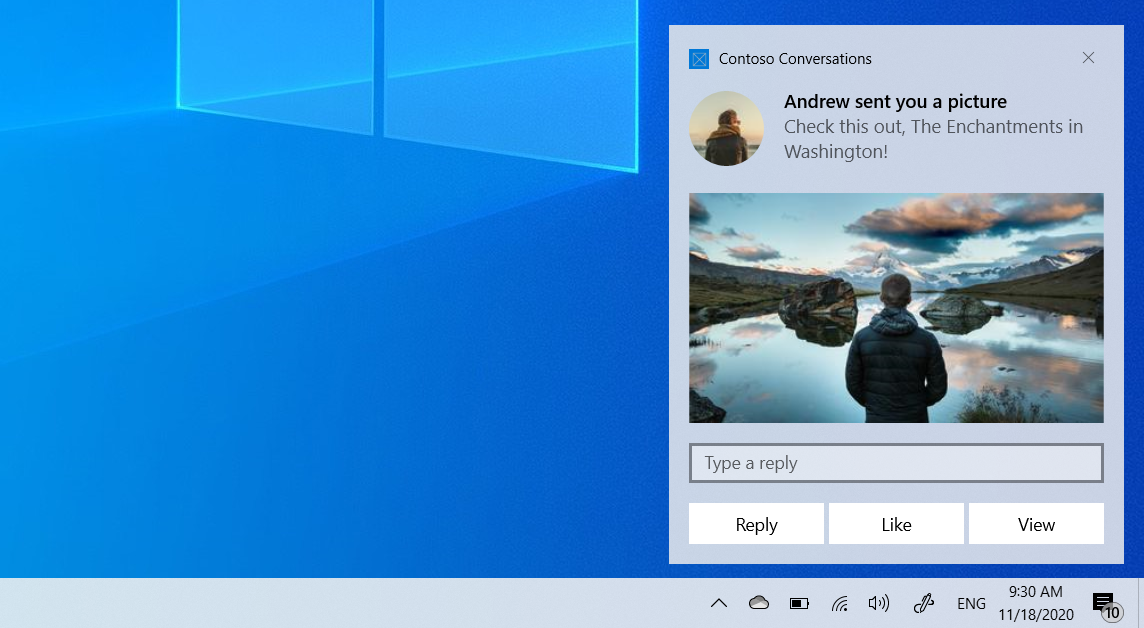
Une notification d’application est une fenêtre contextuelle d’interface utilisateur qui s’affiche en dehors de la fenêtre de votre application, en fournissant des informations ou des actions en temps opportun à l’utilisateur. Les notifications peuvent être purement informationnelles, peuvent lancer votre application quand un clic est activé ou déclencher une action en arrière-plan sans amener votre application au premier plan.
Cet article vous guide tout au long des étapes de création et d’envoi d’une notification d’application à partir d’une application WPF, puis gère l’activation lorsque l’utilisateur interagit avec lui. Cet article utilise les API SDK d'application WindowsMicrosoft.Windows.AppNotifications.
Pour obtenir une vue d’ensemble des notifications d’application et des conseils pour d’autres infrastructures, consultez la vue d’ensemble des notifications d’application.
Cet article traite des notifications locales. Pour plus d’informations sur la remise de notifications à partir d’un service cloud, consultez Notifications Push.
Important
Les notifications pour les applications avec élévation de privilèges (administrateur) ne sont actuellement pas prises en charge.
Prerequisites
- Une application WPF ciblant .NET 6 ou version ultérieure
- Paquet NuGet SDK d'application Windows (
Microsoft.WindowsAppSDK)
Configuration de votre projet
Dans votre fichier projet (.csproj), vérifiez que la TargetFramework inclut une infrastructure cible Windows :
<TargetFramework>net9.0-windows10.0.19041.0</TargetFramework>
Ajoutez le package NuGet SDK d'application Windows :
<PackageReference Include="Microsoft.WindowsAppSDK" Version="1.7.250310001" />
Pour les applications non empaquetées, ajoutez :
<WindowsPackageType>None</WindowsPackageType>
S’inscrire aux notifications d’application
Dans votre App.xaml.cs, inscrivez-vous aux notifications dans le gestionnaire d’événements Startup . Vous devez inscrire votre gestionnaire NotificationInvokedavant d’appeler Register.
Tout d’abord, mettez à jour App.xaml pour utiliser un gestionnaire d’événements Startup au lieu de StartupUri:
App.xaml
<Application x:Class="WpfNotifications.App"
             xmlns="http://schemas.microsoft.com/winfx/2006/xaml/presentation"
             xmlns:x="http://schemas.microsoft.com/winfx/2006/xaml"
             Startup="OnStartup">
</Application>
Ensuite, implémentez la logique de gestion des notifications et de démarrage :
App.xaml.cs
using System.Windows;
using Microsoft.Windows.AppNotifications;

namespace WpfNotifications;

public partial class App : Application
{
    private void OnStartup(object sender, StartupEventArgs e)
    {
        // Register the notification handler before calling Register
        AppNotificationManager.Default.NotificationInvoked += OnNotificationInvoked;
        AppNotificationManager.Default.Register();

        // Show the main window
        var mainWindow = new MainWindow();
        mainWindow.Show();
    }

    private void OnNotificationInvoked(
        AppNotificationManager sender,
        AppNotificationActivatedEventArgs args)
    {
        // NotificationInvoked is raised on a background thread,
        // so dispatch to the UI thread for any UI updates
        Current.Dispatcher.Invoke(() =>
        {
            // Parse args.Argument to determine what action to take.
            // args.Argument contains the arguments from the notification
            // or button that was clicked, as key=value pairs separated
            // by '&', for example "action=reply&conversationId=9813".
        });
    }

    protected override void OnExit(ExitEventArgs e)
    {
        AppNotificationManager.Default.Unregister();
        base.OnExit(e);
    }
}
Important
Vous devez appeler Register avant d'appeler AppInstance.GetCurrent().GetActivatedEventArgs(). Le NotificationInvoked gestionnaire doit être inscrit avant Register() d’être appelé.
Note
Pour les applications non empaquetées, Register() configure automatiquement l’inscription du serveur COM qui permet Windows de lancer votre application lorsqu’une notification est cliqué. Vous n’avez pas besoin de configurer l’activation COM ou un AUMID manuellement.
Envoyer une notification d’application
Utilisez AppNotificationBuilder pour construire le contenu de notification et AppNotificationManager.Show pour envoyer une notification.
MainWindow.xaml.cs
using Microsoft.Windows.AppNotifications;
using Microsoft.Windows.AppNotifications.Builder;

private void SendNotification()
{
    var notification = new AppNotificationBuilder()
        .AddArgument("action", "viewConversation")
        .AddArgument("conversationId", "9813")
        .AddText("Andrew sent you a picture")
        .AddText("Check this out, The Enchantments in Washington!")
        .BuildNotification();

    AppNotificationManager.Default.Show(notification);
}
Pour plus d’informations sur l’ajout de boutons, d’images, d’entrées et d’autres contenus enrichis à vos notifications, consultez le contenu de notification d’application.
Configuration de l’application empaquetée
Pour les applications WPF non empaquetées, Register() gère automatiquement l’inscription COM. Pour les applications empaquetées (MSIX), vous devez ajouter les extensions suivantes à votre Package.appxmanifest:
<Package
  xmlns:com="http://schemas.microsoft.com/appx/manifest/com/windows10"
  xmlns:desktop="http://schemas.microsoft.com/appx/manifest/desktop/windows10"
  IgnorableNamespaces="... com desktop">

  <Applications>
    <Application>
      <Extensions>

        <!--Specify which CLSID to activate when notification is clicked-->
        <desktop:Extension Category="windows.toastNotificationActivation">
          <desktop:ToastNotificationActivation
            ToastActivatorCLSID="YOUR-GUID-HERE" />
        </desktop:Extension>

        <!--Register COM CLSID-->
        <com:Extension Category="windows.comServer">
          <com:ComServer>
            <com:ExeServer
              Executable="YourApp.exe"
              Arguments="----AppNotificationActivated:"
              DisplayName="YourApp">
              <com:Class Id="YOUR-GUID-HERE" />
            </com:ExeServer>
          </com:ComServer>
        </com:Extension>

      </Extensions>
    </Application>
  </Applications>
</Package>
Important
L’attribut Executable doit contenir uniquement le nom de fichier exécutable (par exemple, YourApp.exe), pas un chemin de sous-répertoire.
Contenu connexe
Collaborer avec nous sur GitHub
La source de ce contenu se trouve sur GitHub, où vous pouvez également créer et examiner les problèmes et les demandes de tirage. Pour plus d’informations, consultez notre guide du contributeur.

Windows developer