Note
Access to this page requires authorization. You can try signing in or changing directories.
Access to this page requires authorization. You can try changing directories.
If you customize table or column text, such as column labels or drop-down list values, you can provide users in your environment who aren't working with the base language version of your environment with this customized text in their preferred languages.
The process has the following steps:
- Enable other languages for your environment
- Export the localizable text
- Get the localizable text translated
- Import the localized text
Enable other languages for your environment
If you haven't already enabled the languages for your environment, use the steps described in Enable the language to enable them.
Important
Each language can take several minutes to enable. During this time, other users of the environment might not be able to use your app. Enable languages at a time that is least disruptive to users.
Tip
While you enable the languages, note the LCID values used for each language. This value represents the language in the exported data for the localizable text. Language codes are four-digit or five-digit locale IDs. Valid locale ID values can be found at Locale ID (LCID) Chart).
Export the localizable text
The localizable text that you export comes from the unmanaged solution that contains the localizable text.
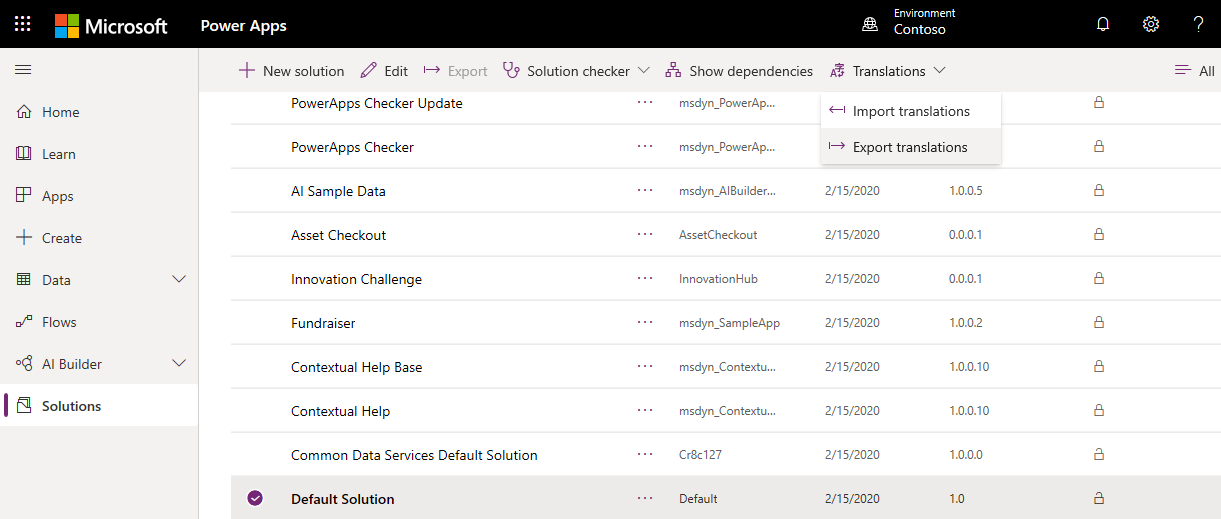
From Power Apps, select Solutions. If the item isn’t in the side panel pane, select …More and then select the item you want.
In the All Solutions list, select the unmanaged solution that contains the localizable text you want.
On the command bar, select Translations > Export Translations.
You could see an alert:
Exporting customized labels for translation can take several minutes. Do not click the export link again until the first export has finished. Are you sure that you want to export now?
Select OK if you want to continue.
When the export is completed, save the translations zip file. The file is named something like CrmTranslations_{0}_{1}.zip, where {0} is the unique name of the solution and {1} is the version number of the solution.
Get the localizable text translated
You can send this file to a linguistic expert, translation agency, or localization firm.
If you have the knowledge to translate the text, or if you just want to see the format, you can extract the zip file that you exported you see that it contains two XML files.
[Content_Types].xmlCrmTranslations.xml
You can open the CrmTranslations.xml file with Microsoft Office Excel.
Tip
Unless you normally open XML files with Excel, it might be easier to open Excel, then choose to open the file by pasting in the path to the extracted CrmTranslations.xml file.
Important
Don't change the file format. If you save the file in another format, you can't import it back.
When you view the data in Excel, look at the Localized Labels tab.

Any custom tables or columns have empty cells for the localizable text. Add the localized values for those items.
Note
If you have changed the display name or description for any standard table or table column, the localized strings will still reflect the translations for the original value. Those should be localized to reflect the new value.
The Display Strings tab contains text that is displayed for other UI elements such as ribbon commands, error messages, and form labels.
Update localizable text in the base language
If you change the display name for any standard table or table column, which is included in any special message, update the information in the Display Strings tab to use the customized name.
Tip
Although the UI exposed to edit system table messages includes many references to table names, it doesn't include all of them. Using this technique might find more. More information: Edit system table messages
For example, if you change the display name for the Account table to Company, search through the base language column in the Display Strings for the following matches: account, accounts, Account, and Accounts then make appropriate replacements to company, companies, Company, and Companies respectively.
Important
Don't do a general find and replace in the file for this. Make sure that the matching text actually refers to the names that you changed.
Import the localized text
Importing the text requires compressing the files and importing them into the system.
Compress the files
After you make changes to the CrmTranslations.xml file, compress the file together with the [Content_Types].xml file into the zip format. Select both files and then right-click to open the context menu. In the context menu, choose Send to > Compressed (zipped) folder.
Import the files
From the same unmanaged solution that you exported the translations from, in the menu choose Translations > Import Translations.

Select the file that contains the compressed translated text and select Import.
After you import the translated text, publish all customizations to see the changes in your apps.