Hinweis
Für den Zugriff auf diese Seite ist eine Autorisierung erforderlich. Sie können versuchen, sich anzumelden oder das Verzeichnis zu wechseln.
Für den Zugriff auf diese Seite ist eine Autorisierung erforderlich. Sie können versuchen, das Verzeichnis zu wechseln.
Mit dem Metadatensicherheitsprotokoll (Metadata Security Protocol, MSP) können Sie eine benutzerdefinierte rollenbasierte Zugriffssteuerung (RBAC)-Zulassungsliste definieren, um Metadatendienstendpunkte zu sichern. Der Inhalt der Zulassungsliste stammt aus Überwachungsprotokollen. Ein neuer Ressourcentyp in Azure Compute Gallery, InVMAccessControlProfile, aktiviert die Erlaubnisliste.
Weitere Informationen zu RBAC und dem InVMAccessControlProfile Ressourcentyp finden Sie unter "Erweiterte Konfiguration für MSP".
Struktur einer Erlaubnisliste
Eine Zulassungsliste besteht aus:
- Identitäten: Prozesse auf dem Computer.
- Berechtigungen: Endpunkte, auf die die Identitäten zugreifen.
- Rollen: Eine Gruppierung von Berechtigungen.
- Rollenzuweisungen: Rollen und die Liste der Identitäten, denen der Zugriff für diese Rollen gewährt wurde.
Sammeln von Überwachungsprotokollen
Wenn Sie MSP im audit oder enforce Modus aktivieren, können Sie Protokolldaten über Azure Monitor vom Client für virtuelle Computer sammeln.
Windows: Der Azure-Überwachungs-Agent sammelt Windows-Ereignisse über benutzerdefinierte xPath
Windows Azure!*[System[Provider[@Name=`GuestProxyAgent`]]]Linux: Sammeln von Syslog-Ereignissen mit Azure Monitor Agent durch Auswählen
Log_DAEMONundLOG_DEBUG
Abfrageüberwachungsprotokolle
Nachdem die Überwachungsprotokolle wie im vorherigen Abschnitt erläutert gesammelt wurden, können Sie die Protokolle überprüfen:
Windows Kusto-Abfrage: Wechseln Sie zu Log Analytics, und führen Sie die Abfrage aus.
/// Windows VMs
Event
| where TimeGenerated >ago(1d)
| where EventLog == "Windows Azure" and Source == "GuestProxyAgent"
| where _ResourceId startswith "/subscriptions/<your subscription id>/resourcegroups/<your recrouce group>"
| where RenderedDescription  has  "processFullPath" and RenderedDescription  has "runAsElevated" and RenderedDescription has "processCmdLine"
| extend json = parse_json(RenderedDescription)
| extend method = json.method, url = json.url, processFullPath = json.processFullPath, username = json.userName, runAsElevated = json.runAsElevated
| extend userGroups = json.userGroups, ip = json.ip, port = json.port, processCmdLine = json.processCmdLine
| project TimeGenerated, _ResourceId, url, ip, port, processFullPath, method, username, runAsElevated, processCmdLine
Linux Kusto-Abfrage: Wechseln Sie zu Log Analytics, und führen Sie die Abfrage aus.
/// Linux VMs
Syslog
| where TimeGenerated >ago(1d)
| where  ProcessName == "azure-proxy-agent"
| where _ResourceId startswith "/subscriptions/<your subscription id>/resourcegroups/<your recrouce group>"
| where SyslogMessage  has  "processFullPath" and SyslogMessage  has "runAsElevated" and SyslogMessage has "processCmdLine"
| extend message = substring(SyslogMessage, indexof(SyslogMessage, "{"))
| extend json = parse_json(message)
| extend method = json.method, url = json.url, processFullPath = json.processFullPath, username = json.userName, runAsElevated = json.runAsElevated
| extend userGroups = json.userGroups, ip = json.ip, port = json.port, processCmdLine = json.processCmdLine
| project TimeGenerated, _ResourceId, url, ip, port, processFullPath, method, username, runAsElevated, processCmdLine
Wenn Sie der Besitzer der Azure-VM sind, können Sie die Dateiprotokolle innerhalb der Azure-VM abrufen, indem Sie die folgenden Schritte ausführen.
Suchen Sie die Json-Konfigurationsdatei des Proxy-Agents:
- Windows-VM:
GuestProxyAgent.jsonim Ordner alsGuestProxyAgent windows service - Linux-VM:
etc/azure/proxy-agent.jsonDatei
- Windows-VM:
Aktivieren Sie das Dateiprotokoll, indem Sie die Einstellung
logFolderin der JSON-Konfigurationsdatei aktualisieren. Legen Sie sie auf Folgendes fest-
%SYSTEMDRIVE%\\WindowsAzure\\ProxyAgent\\Logsfür Windows-VMs -
/var/log/azure-proxy-agentfür Linux-VMs.
-
Dienst neu starten
-
GuestProxyAgentfür Windows-VMs -
azure-proxy-agentfür Linux-VMs 4
- Warten Sie, bis
ProxyAgent.Connection.logausfüllt wird, während der Kundendienst läuft. - Ziehen Sie die ProxyAgent-Verbindungsdatei-Protokolle von den Azure-VMs ab
Fenster:
C:\WindowsAzure\ProxyAgent\Logs\ProxyAgent.Connection.logLinux:
/var/log/azure-proxy-agent/ProxyAgent.Connection.log
Konvertieren von Protokollen in Regeln
Um eine Zulassungsliste zu erstellen, können Sie eine automatisierte Methode oder eine manuelle Methode verwenden.
Automatisches Generieren einer Freigabeliste
Sie können ein Allowlist-Generatortool verwenden, um die Zugriffssteuerungsregeln zu generieren. Das Tool hilft beim Analysieren der Überwachungsprotokolle und stellt eine Benutzeroberfläche zum Generieren der Regeln bereit.
Laden Sie das Tool für den Allowlist-Generator herunter, und führen Sie es aus. Wählen Sie auf der Seite "Neueste Version" unter "Objekte" die Option
allowListTool.exeaus.Das Tool analysiert die
ProxyAgentConnectionProtokolle und zeigt die aktuellen Berechtigungen und Identitäten auf dem virtuellen Computer an.Erstellen von Rollen und Rollenzuweisungen:
- Um eine Rolle zu erstellen, wählen Sie eine Gruppierung von Berechtigungen aus, und geben Sie der Rolle einen beschreibenden Namen.
- Um eine Rollenzuweisung zu erstellen, wählen Sie eine Rolle und eine Gruppierung von Identitäten aus. Diese Identitäten können auf die in dieser Rolle gruppierten Berechtigungen zugreifen. Weisen Sie der Rollenzuweisung einen beschreibenden Namen zu.
Manuelles Erstellen einer Zulassungsliste
Nachdem Sie einen virtuellen Computer mit MSP im Audit oder Enforce Modus aktiviert haben, erfasst der Proxy-Agent alle Anforderungen, die an die Hostendpunkte gesendet werden.
In den Verbindungsprotokollen können Sie die Anwendungen analysieren, die die Anforderungen an den Azure Instance Metadata Service oder WireServer-Endpunkte stellen.

Das folgende Beispiel zeigt das Format des erfassten JSON.

In der Protokolldatei können Sie die Endpunkte identifizieren, die Sie schützen möchten. Diese Endpunkte werden in privileges der endgültigen InVMAccessControlProfile Instanz angezeigt. Sie können auch die Identitäten (identities) identifizieren, die Zugriff haben sollen.
Ein einfaches Regelschema könnte wie im folgenden Beispiel aussehen.

Erstellen einer InVMAccessControlProfile-Instanz mithilfe einer ARM-Vorlage
Erstellen Sie einen neuen privaten Katalog in Azure Compute Gallery.
Erstellen Sie eine
InVMAccessControlProfileDefinition mit Parametern für:- Galeriename zum Speichern (aus Schritt 1)
- Profilname
- Betriebssystemtyp
- Hostendpunkttyp (WireServer- oder Instanzmetadatendienst)
Erstellen Sie eine bestimmte Version.
Beispiel für InVMAccessControlProfile
Hier ist eine Beispielinstanz InVMAccessControlProfile :
"properties": {
    "mode": "Enforce",
    "defaultAccess": "Allow",
    "rules": {
      "privileges": [
        {
          "name": "GoalState",
          "path": "/machine",
          "queryParameters": {
            "comp": "goalstate"
          }
        }
      ],
      "roles": [
        {
          "name": "Provisioning",
          "privileges": [
            "GoalState"
          ]
        },
        {
          "name": "ManageGuestExtensions",
          "privileges": [
            "GoalState"
          ]
        },
        {
          "name": "MonitoringAndSecret",
          "privileges": [
            "GoalState"
          ]
        }
      ],
      "identities": [
        {
          "name": "WinPA",
          "userName": "SYSTEM",
          "exePath": "C:\\Windows\\System32\\cscript.exe"
        },
        {
          "name": "GuestAgent",
          "userName": "SYSTEM",
          "processName": "WindowsAzureGuestAgent.exe"
        },
        {
          "name": "WaAppAgent",
          "userName": "SYSTEM",
          "processName": "WaAppAgent.exe"
        },
        {
          "name": "CollectGuestLogs",
          "userName": "SYSTEM",
          "processName": "CollectGuestLogs.exe"
        },
        {
          "name": "AzureProfileExtension",
          "userName": "SYSTEM",
          "processName": "AzureProfileExtension.exe"
        },
        {
          "name": "AzurePerfCollectorExtension",
          "userName": "SYSTEM",
          "processName": "AzurePerfCollectorExtension.exe"
        },
        {
          "name": "WaSecAgentProv",
          "userName": "SYSTEM",
          "processName": "WaSecAgentProv.exe"
        }
      ],
      "roleAssignments": [
        {
          "role": "Provisioning",
          "identities": [
            "WinPA"
          ]
        },
        {
          "role": "ManageGuestExtensions",
          "identities": [
            "GuestAgent",
            "WaAppAgent",
            "CollectGuestLogs"
          ]
        },
        {
          "role": "MonitoringAndSecret",
          "identities": [
            "AzureProfileExtension",
            "AzurePerfCollectorExtension",
            "WaSecAgentProv"
          ]
        }
      ]
    },
Mithilfe von PowerShell
Wenn Sie PowerShell verwenden, um ein InVMAccessControlProfile zu generieren, stellen Sie sicher, dass Sie die Mindestversion 10.1.0 von PowerShell installiert haben.
Befolgen Sie die nachstehende Schritt-für-Schritt-Anleitung, um eine InVMAccessControlProfile zu generieren.
- Melden Sie sich bei Ihrem Azure-Konto an
Connect-AzAccount
- Erstellen Sie die Ressourcengruppe, in der der private Katalog erstellt wird. Sie können diesen Schritt überspringen, wenn Sie bereits eine Ressourcengruppe erstellt haben.
$resourceGroup = "MyResourceGroup4"
$location = "EastUS2EUAP"
New-AzResourceGroup -Name $resourceGroup -Location $location
- Erstellen Sie eine private Galerie. Diese Galerie wird als Container für das
InVMAccessControlProfileArtefakt verwendet.
$galleryName = "MyGallery4"
New-AzGallery -ResourceGroupName $resourceGroup -GalleryName $galleryName -Location $location -Description "My custom image gallery"
- Erstellen Sie das
InVMAccessControlProfileArtefakt in der privaten Galerie, die im vorherigen Schritt erstellt wurde. Klicken Sie hier , um mehr über die verschiedenen Parameter für dieses Artefakt zu erfahren.
$InVMAccessControlProfileName= "testInVMAccessControlProfileP"

New-AzGalleryInVMAccessControlProfile -ResourceGroupName  $resourceGroup  -GalleryName $galleryName   -GalleryInVMAccessControlProfileName $InVMAccessControlProfileName -Location $location -OsType "Windows" -ApplicableHostEndPoint "WireServer" -Description "this test1"
- Katalog abrufen
InVMAccessControlProfile
$inVMAccessCP=Get-AzGalleryInVMAccessControlProfile -ResourceGroupName $resourceGroup -GalleryName $galleryName -GalleryInVMAccessControlProfileName $InVMAccessControlProfileName

7. Erstellen Sie InVMAccessControlProfileVersion
Zum Erstellen einer InVMAccessControlProfileVersion ist eine Nutzlast erforderlich. Da diese Nutzlasten groß sein können, insbesondere aufgrund der Regeleigenschaft, ist es nicht praktisch, einen einzelnen PowerShell-Befehl zum Erstellen der gesamten Ressource in einem Vorgang zu verwenden. Die Regeleigenschaft in jeder Versionsnutzlast besteht aus vier Arrays: Berechtigungen, Rollen, Identitäten und Rollenaufgaben. Diese Arrays können die Nutzlast groß und komplex machen. Um diesen Prozess zu vereinfachen, haben wir das GalleryInVMAccessControlProfileVersionConfig PowerShell-Objekt eingeführt. Weitere Informationen dazu finden Sie hier.
Mit diesem Objekt können Sie die Konfiguration mithilfe verschiedener Befehle inkrementell erstellen, um Regeleigenschaften hinzuzufügen oder zu entfernen.
Sobald das Konfigurationsobjekt bereit ist, können Sie es verwenden, um ein InVMAccessControlProfileVersion zu erstellen, das in den anstehenden Abschnitten beschrieben wird.
Wenn Sie bereits über die Regeleigenschaft als JSON-Zeichenfolge verfügen und das Konfigurationsobjekt nicht verwenden möchten, können Sie diese Schritte überspringen und die InVMAccessControlProfileVersion mithilfe einer ARM-Vorlagenbereitstellung erstellen, die weiter unten im Abschnitt behandelt wird.
Nutzlast für Referenz:
{
  "name": "1.0.0",
  "location": "East US 2 EUAP",
  "properties": {
    "mode": "Audit",
    "defaultAccess": "Deny",
    "rules": {
      "privileges": [
        {
          "name": "GoalState",
          "path": "/machine",
          "queryParameters": {
            "comp": "goalstate"
          }
        }
      ],
      "roles": [
        {
          "name": "Provisioning",
          "privileges": [
            "GoalState"
          ]
        }
      ],
      "identities": [
        {
          "name": "WinPA",
          "userName": "SYSTEM",
          "groupName": "Administrators",
          "exePath": "C:\\Windows\\System32\\cscript.exe",
          "processName": "cscript"
        }
      ],
      "roleAssignments": [
        {
          "role": "Provisioning",
          "identities": [
            "WinPA"
          ]
        }
      ]
    },
    "targetLocations": [
      {
        "name": "East US 2 EUAP"
      }
    ],
    "excludeFromLatest": false
  }
}
- Konfiguration
InVMAccessControlProfileVersionerstellen
$inVMAccessControlProfileVersionName= "1.0.0"
$targetRegions= @("EastUS2EUAP", "CentralUSEUAP")
$inVMAccessConrolProfileVersion = New-AzGalleryInVMAccessControlProfileVersionConfig `
 -Name $inVMAccessControlProfileVersionName  `
-Location $location  `
-Mode "Audit"  `
-DefaultAccess "Deny" -TargetLocation $targetRegions  -ExcludeFromLatest

Führen Sie diesen Befehl aus, um die einzelnen Berechtigungen hinzuzufügen:
Add-AzGalleryInVMAccessControlProfileVersionRulesPrivilege `
  -GalleryInVmAccessControlProfileVersion $inVMAccessConrolProfileVersion `
  -PrivilegeName "GoalState" `
  -Path "/machine" `
  -QueryParameter @{ comp = "goalstate" }
So entfernen Sie ein Privileg:
Remove-AzGalleryInVMAccessControlProfileVersionRulesPrivilege `
 -GalleryInVmAccessControlProfileVersion $inVMAccessConrolProfileVersion `
 -PrivilegeName "GoalState2"
Führen Sie diesen Befehl aus, um jede Rolle hinzuzufügen:
Add-AzGalleryInVMAccessControlProfileVersionRulesRole `
 -GalleryInVmAccessControlProfileVersion $inVMAccessConrolProfileVersion `
 -RoleName "Provisioning" `
 -Privilege @("GoalState")
Führen Sie diesen Befehl aus, um Rollen zu entfernen:
Remove-AzGalleryInVMAccessControlProfileVersionRulesRole `
 -GalleryInVmAccessControlProfileVersion $inVMAccessConrolProfileVersion `
 -RoleName "Provisioning2"
Fügen Sie RulesIdentity hinzu:
Add-AzGalleryInVMAccessControlProfileVersionRulesIdentity `
  -GalleryInVmAccessControlProfileVersion $inVMAccessConrolProfileVersion `
  -IdentityName "WinPA" `
  -UserName "SYSTEM" `
  -GroupName "Administrators" `
  -ExePath "C:\Windows\System32\cscript.exe" `
  -ProcessName "cscript"
RemoveRulesIdentity:
Remove-AzGalleryInVMAccessControlProfileVersionRulesIdentity `
  -GalleryInVmAccessControlProfileVersion $inVMAccessConrolProfileVersion `
  -IdentityName "WinPA2"
Führen Sie diesen Befehl aus, um jede Rollenzuweisung hinzuzufügen:
Add-AzGalleryInVMAccessControlProfileVersionRulesRoleAssignment `
  -GalleryInVmAccessControlProfileVersion $inVMAccessConrolProfileVersion `
  -Role "Provisioning" `
  -Identity @("WinPA")
Rollenzuweisung entfernen:
Remove-AzGalleryInVMAccessControlProfileVersionRulesRoleAssignment `
  -GalleryInVmAccessControlProfileVersion $inVMAccessConrolProfileVersion `
  -Role "Provisioning2"
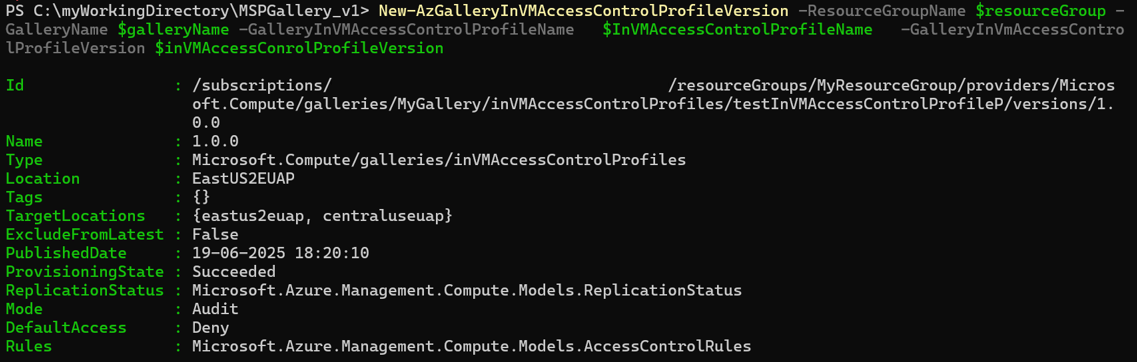
- Katalog erstellen
InVMAccessControlProfileVersion
New-AzGalleryInVMAccessControlProfileVersion -ResourceGroupName $resourceGroup -GalleryName $galleryName -GalleryInVMAccessControlProfileName $InVMAccessControlProfileName -GalleryInVmAccessControlProfileVersion $inVMAccessConrolProfileVersion
- Get
InVMAccessControlProfileVersion
$ver = Get-AzGalleryInVMAccessControlProfileVersion -ResourceGroupName $resourceGroup -GalleryName $galleryName -GalleryInVMAccessControlProfileName   $InVMAccessControlProfileName `
 -GalleryInVMAccessControlProfileVersionName  $inVMAccessControlProfileVersionName
 $ver | ConvertTo-Json -Depth 10
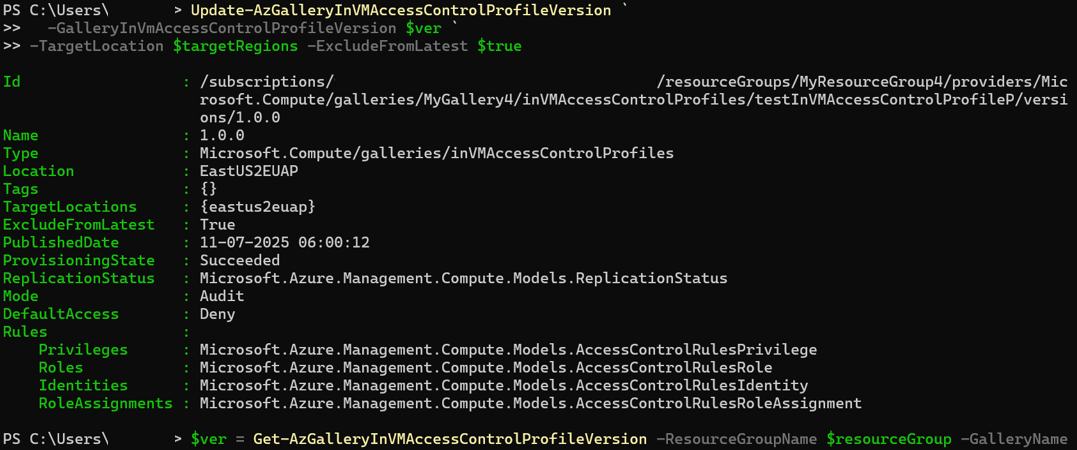
- Aktualisieren von
InVMAccessControlProfileVersion
Es wird empfohlen, eine neue InVMAccessControlProfileVersion Zu erstellen, da die meisten Parameter nicht aktualisiert werden können. Ein Beispiel:
$targetRegions= @("EastUS2EUAP")

$ver = Get-AzGalleryInVMAccessControlProfileVersion -ResourceGroupName $resourceGroup -GalleryName $galleryName -GalleryInVMAccessControlProfileName   $InVMAccessControlProfileName `
 -GalleryInVMAccessControlProfileVersionName  $inVMAccessControlProfileVersionName


Update-AzGalleryInVMAccessControlProfileVersion `
  -GalleryInVmAccessControlProfileVersion $ver `
-TargetLocation $targetRegions -ExcludeFromLatest $true
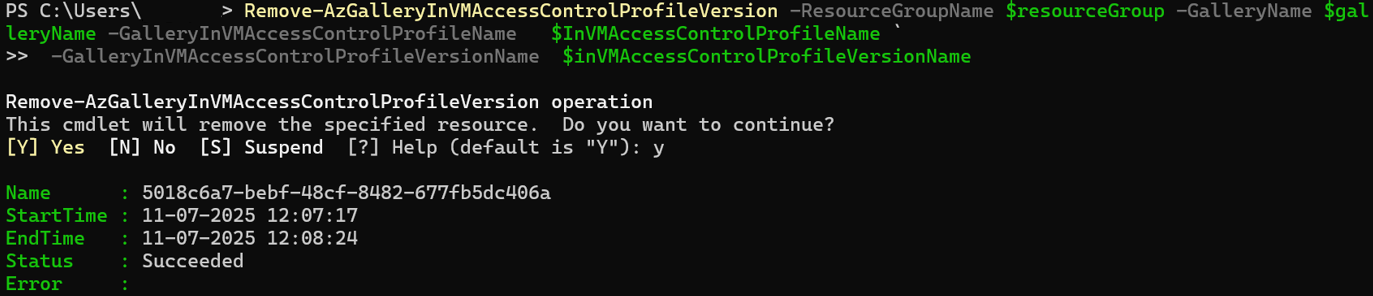
- Delete
InVMAccessControlProfileVersion
Remove-AzGalleryInVMAccessControlProfileVersion -ResourceGroupName $resourceGroup -GalleryName $galleryName -GalleryInVMAccessControlProfileName   $InVMAccessControlProfileName `
 -GalleryInVMAccessControlProfileVersionName  $inVMAccessControlProfileVersionName
- Alle Galerien auflisten
InVMAccessControlProfile
Get-AzGalleryInVMAccessControlProfile -ResourceGroupName "myResourceGroup" -GalleryName "myGallery"

Verwenden von CLI
Befolgen Sie die nachstehende Schritt-für-Schritt-Anleitung, um eine InVMAccessControlProfile zu generieren.
- Melden Sie sich bei Ihrem Azure-Konto an
az login
- Erstellen einer Ressourcengruppe an Ihrem gewünschten Speicherort
az group create --resource-group ResourceGroupForINVM --location eastus
- Erstellen Sie eine Galerie, die die
InVMAccessControlProfile-Ressource enthalten wird
az sig create --resource-group ResourceGroupForINVM --gallery-name MyGallery67 --location eastus
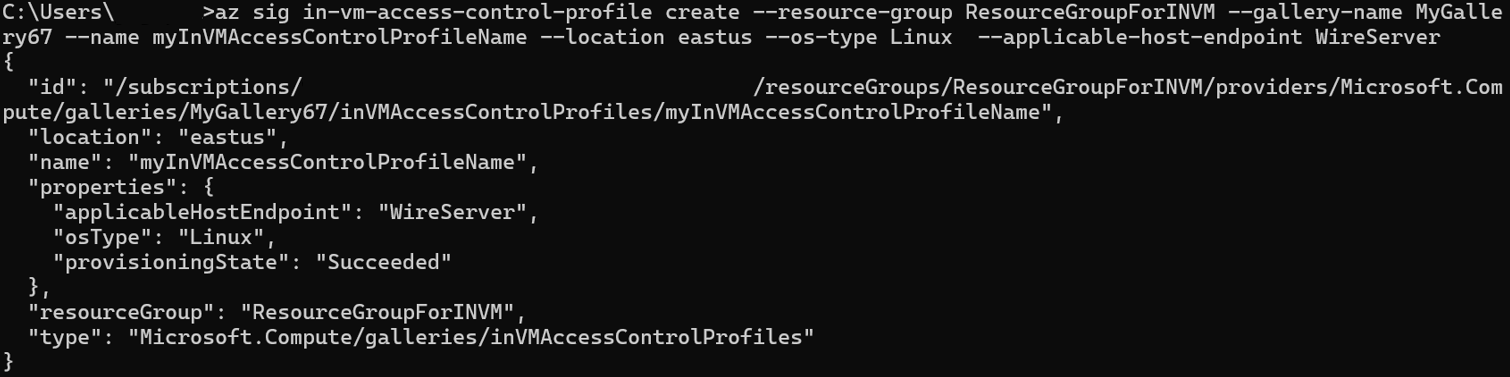
- Erstellen Sie einen
InVMAccessControlProfileunter der Galerie, die im vorherigen Schritt erstellt wurde. Weitere Details zu Befehlen: az sig in-vm-access-control-profile | Microsoft Learn
az sig in-vm-access-control-profile create --resource-group ResourceGroupForINVM --gallery-name MyGallery67 --name myInVMAccessControlProfileName --location eastus --os-type Linux --applicable-host-endpoint WireServer
Führen Sie diesen Befehl aus, um weitere Details zu den Befehlen und Eigenschaften anzuzeigen.
az sig in-vm-access-control-profile create --help
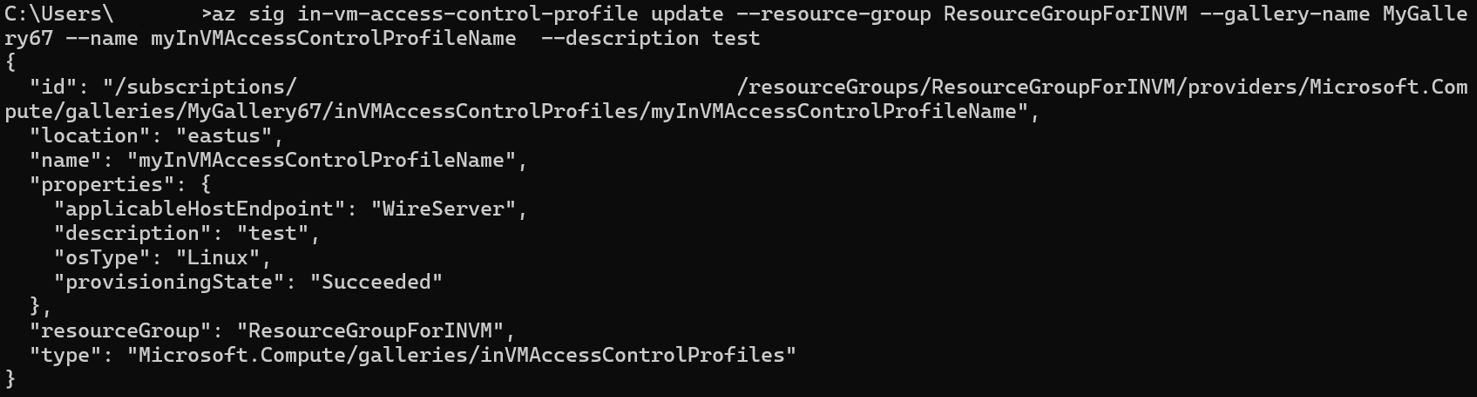
- Sie können nur die
InVMAccessControlProfileBeschreibung derInVMAccessControlProfileaktualisieren. Wenn zusätzliche Änderungen erforderlich sind, löschen Sie den aktuellenInVMAccessControlProfile, und erstellen Sie eine neue
az sig in-vm-access-control-profile update --resource-group ResourceGroupForINVM --gallery-name MyGallery67 --name myInVMAccessControlProfileName --description test
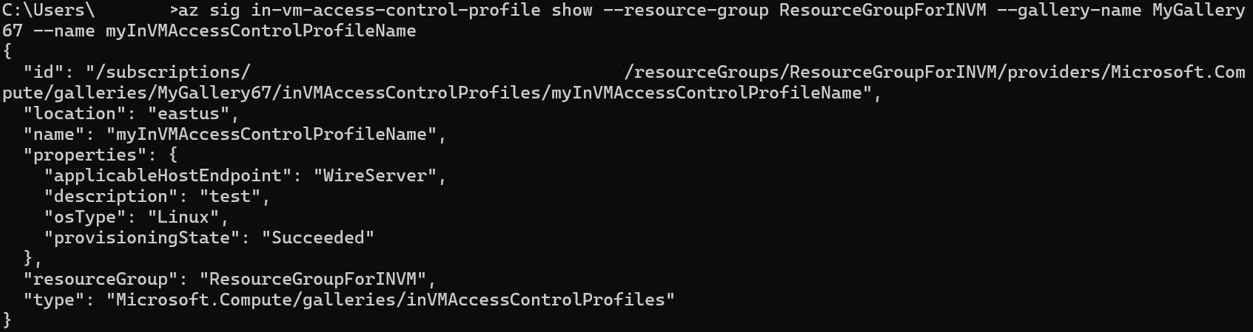
- Abrufen des Vorgangs für
InVMAccessControlProfile
az sig in-vm-access-control-profile show --resource-group ResourceGroupForINVM --gallery-name MyGallery67 --name myInVMAccessControlProfileName
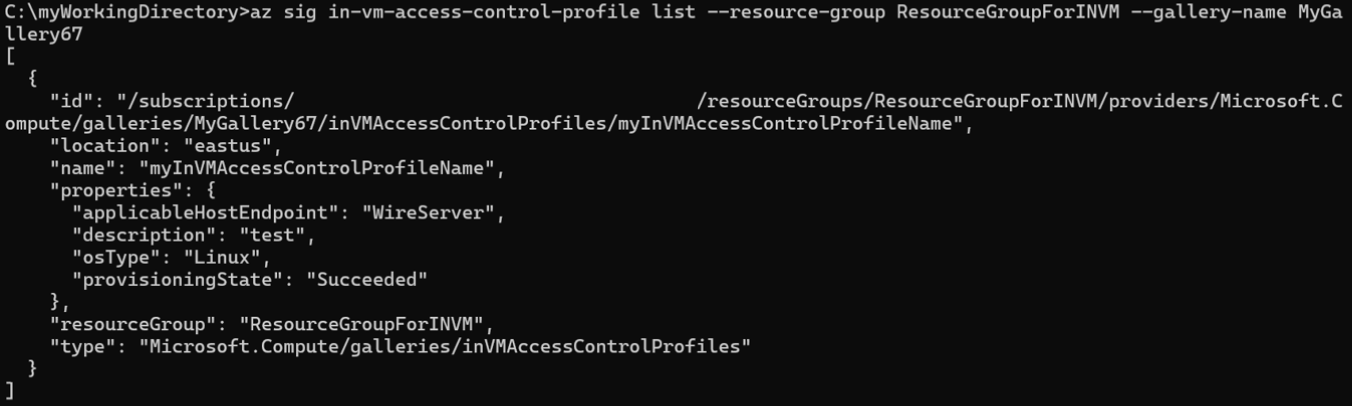
- Auflisten aller
InVMAccessControlProfileArtefakte
Mit diesem Befehl wird die Liste aller InVMAccessControlProfile unter einer bestimmten Galerie angezeigt.
az sig in-vm-access-control-profile show --resource-group ResourceGroupForINVM --gallery-name MyGallery67
- Erstellen Sie
InVMAccessControlProfileVersion.
Sie müssen eine Payload liefern, um eine InVMAccessControlProfileVersion zu erstellen. Diese Nutzlast kann groß sein, insbesondere aufgrund der Eigenschaft der Regel, die umfangreiche Konfigurationen enthalten kann.
Anstatt einzelne Teile der Regeleigenschaft direkt zu übergeben, haben wir einen Regelparameter eingeführt, der eine JSON-Datei als Eingabe akzeptiert. Dieser Ansatz vereinfacht den Prozess und sorgt dafür, dass der Befehl sauber und verwaltbar bleibt.
Hier ist eine Beispiel-"rules.json"-Datei:
 1. {
 2.   "privileges": [
 3. 	{
 4. 	  "name": "GoalState",
 5. 	  "path": "/machine",
 6. 	  "queryParameters": {
 7. 		"comp": "goalstate"
 8. 	  }
 9. 	}
10.   ],
11.   "roles": [
12. 	{
13. 	  "name": "Provisioning",
14. 	  "privileges": [
15. 		"GoalState"
16. 	  ]
17. 	}
18.   ],
19.   "identities": [
20. 	{
21. 	  "name": "WinPA",
22. 	  "userName": "SYSTEM",
23. 	  "groupName": "Administrators",
24. 	  "exePath": "C:\\Windows\\System32\\cscript.exe",
25. 	  "processName": "cscript"
26. 	}
27.   ],
28.   "roleAssignments": [
29. 	{
30. 	  "role": "Provisioning",
31. 	  "identities": [
32. 		"WinPA"
33. 	  ]
34. 	}
35.   ]
36. }
Weitere Befehlsdetails finden Sie hier: az sig in-vm-access-control-profile-version | Microsoft Learn
Nachdem Sie Ihre Version der Datei rules.json erstellt haben, verwenden Sie den folgenden Befehl, um die InVMAccessControlProfileVersion zu erstellen
 az sig in-vm-access-control-profile-version create \
   --resource-group ResourceGroupForINVM  \
   --gallery-name MyGallery67  \
   --profile-name myInVMAccessControlProfileName \
   --version-name 1.0.0 \
   --mode Audit \
   --default-access Deny  \
   --target-regions EastUS2EUAP  \
   --exclude-from-latest true \
   --rules @rules.json
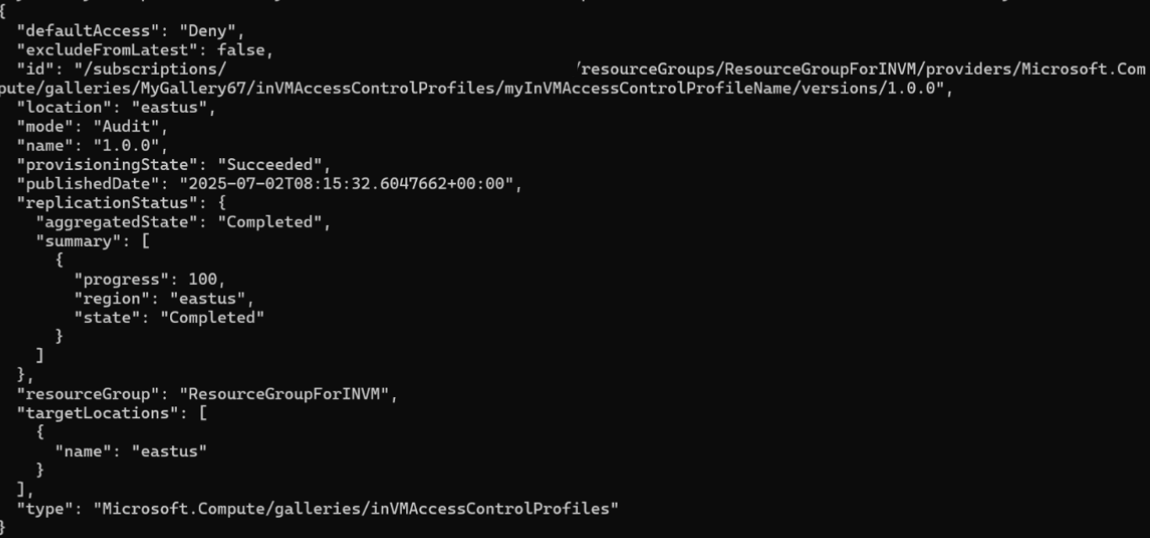
- Get
InVMAccessControlProfileVersion
az sig in-vm-access-control-profile-version show --resource-group ResourceGroupForINVM --gallery-name MyGallery67 --profile-name myInVMAccessControlProfileName --profile-version 1.0.0
- Auflisten aller
InVMAccessControlProfileVersionArtefakte
az sig in-vm-access-control-profile-version list --resource-group ResourceGroupForINVM --gallery-name MyGallery67 --profile-name myInVMAccessControlProfileName
- Delete
InVMAccessControlProfileVersion
Bevor Sie ein InVMAccessControlProfileVersion löschen, stellen Sie sicher, dass es von keinem InVMAccessControlProfile auf einem virtuellen Computer oder virtuellen Computer-Skalierungsgruppe verwendet wird.
az sig in-vm-access-control-profile-version delete --resource-group ResourceGroupForINVM --gallery-name MyGallery67 --profile-name myInVMAccessControlProfileName --profile-version 1.0.0
- Delete
InVMAccessControlProfile
az sig in-vm-access-control-profile delete --resource-group ResourceGroupForINVM --gallery-name MyGallery67 --name myInVMAccessControlProfileName