Bemærk
Adgang til denne side kræver godkendelse. Du kan prøve at logge på eller ændre mapper.
Adgang til denne side kræver godkendelse. Du kan prøve at ændre mapper.
Azure DevOps Services | Azure DevOps Server | Azure DevOps Server 2022
Link work items to branches, commits, pull requests, and builds so your team can trace every code change back to a planned task. When you create a branch from a work item, Azure Boards links them automatically.
This article walks through creating branches, linking commits, and managing pull requests in an Azure DevOps Git repository. For GitHub repositories, see Link GitHub commits and pull requests to work items.
Tip
Set up automatic linking so work items stay connected to commits, pull requests, and builds without manual effort:
- Azure Boards and Azure Repos integration
- Configure pipelines to support work tracking
- Link work items to builds and deployments
Tip
You can use AI to help with this task later in this article, or see Enable AI assistance with Azure DevOps MCP Server to get started.
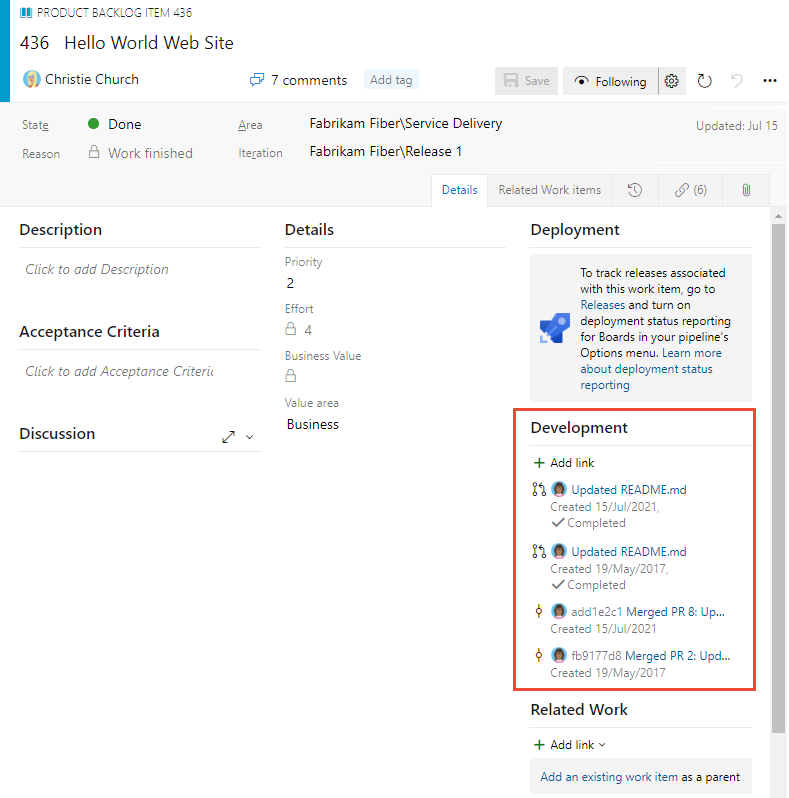
Development control
The Development control on the work item form displays linked branches, commits, pull requests, and builds in one place. From this control, you can create branches or pull requests and navigate directly to any linked artifact.
Note
The Development control appears only in the web portal. Visual Studio and other clients don't include it.
Prerequisites
| Category | Requirements |
|---|---|
| Project access | Project member. |
| Permissions | Member of the Contributors or Project Administrators group. |
| Work item access | View work items in this node and Edit work items in this node set to Allow. The Contributors group has this permission by default. For more information, see Set permissions and access for work tracking. |
Create a branch, make changes, and submit a pull request
In the Development section of the work item, select Create a branch.
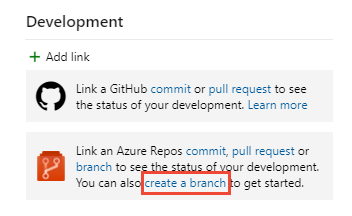
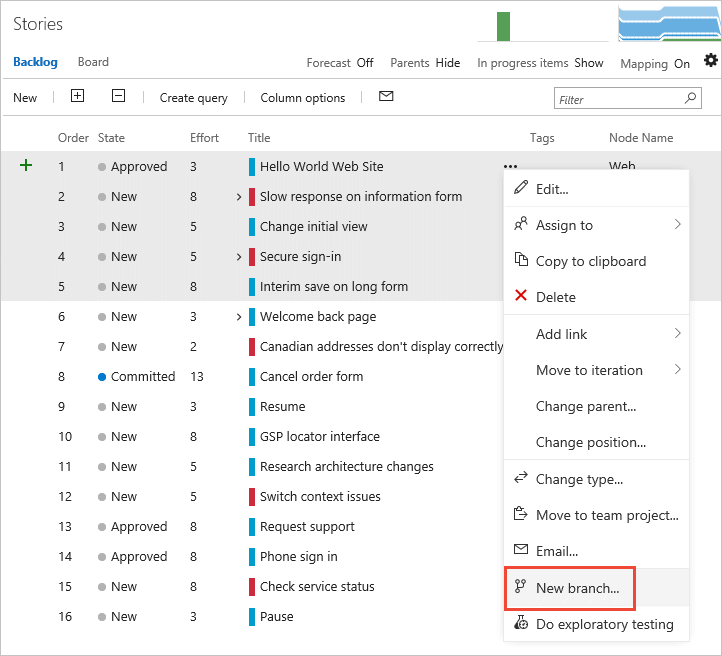
Alternatively, select
 Actions > New branch.
Name the branch, select the repository, and select Create branch.
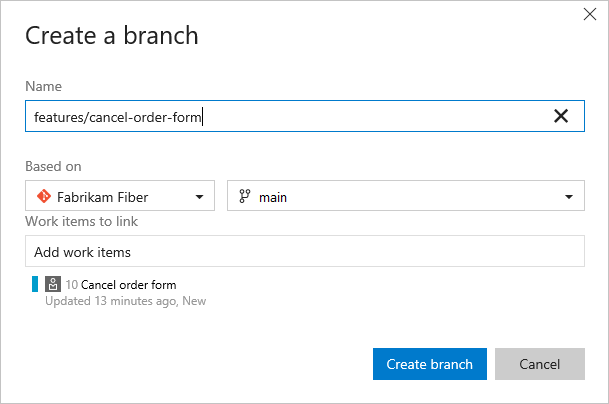
The branch links to the work item automatically, and the repository opens to the new branch.
Note
The main branch must contain at least one file before you can create a branch. Each new project includes a README file in the initial repo.
Edit files in the web portal, or clone the repo and work locally in Visual Studio or another IDE. For more information, see Download changes with fetch.
Commit and push your changes to the repository.
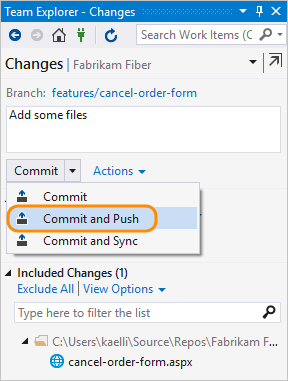
For a new branch, publish it before pushing. For more information, see Share code with push.
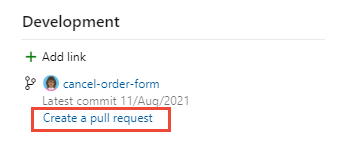
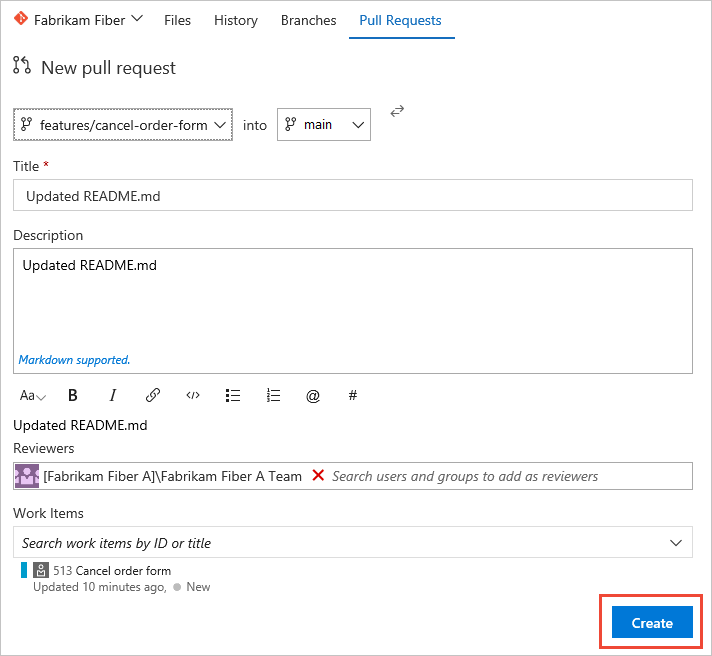
In the Development section, create a pull request to merge your changes and start a code review.
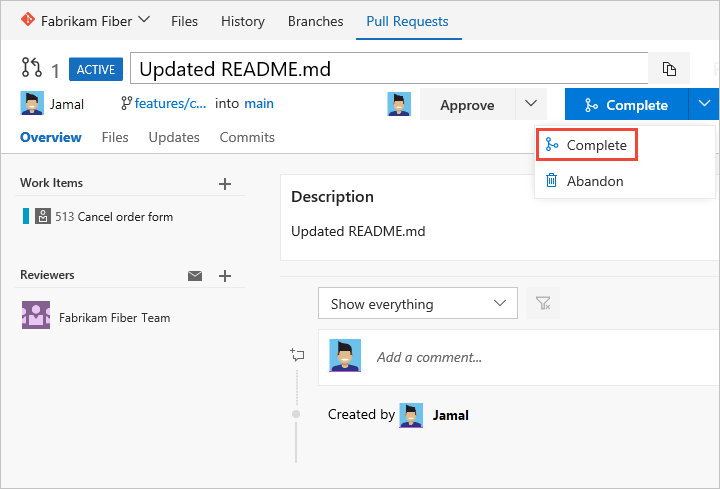
Complete the pull request on the Pull Requests page.
Note
You can't create another pull request for the same branch until the current one completes.
(Optional) Select Squash changes when merging, and then complete the merge.
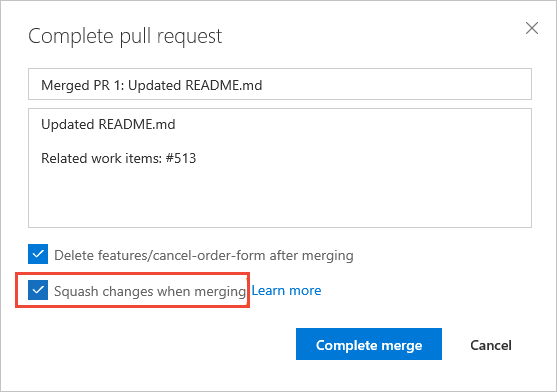
A confirmation appears after the pull request completes.
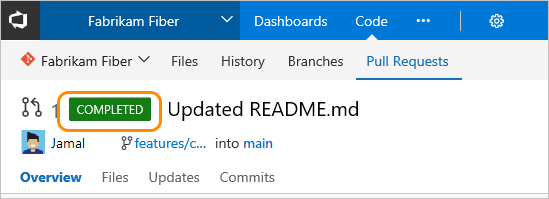
Refresh the work item form and select Maximize Development
 to see links for the branch, commits, and pull request.
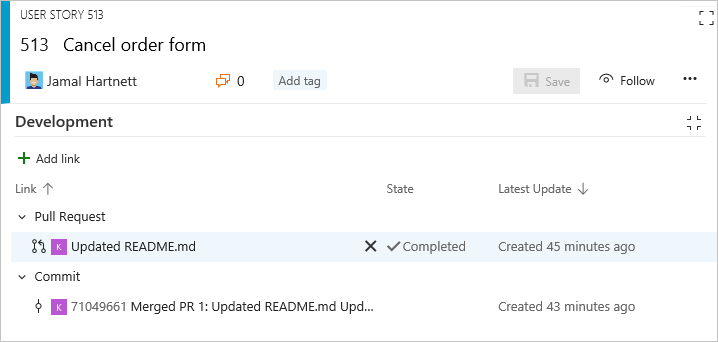
Create a branch for several work items
Use multi-select on the backlog or board to select multiple work items, and then create a branch that links to all of them at once.
Specify the branch name in the dialog.

Link to existing development and build objects
Development links also appear on the Links ![]() and History
and History ![]() tabs of the work item form.
tabs of the work item form.

To link a work item to an existing branch, commit, build, or other object, select ![]() Add link and choose the link type.
Add link and choose the link type.

Remove a link
In the Development section, select the link and select Remove link ![]() .
.

On the Links ![]() tab, select Actions
tab, select Actions ![]() > Remove link
> Remove link ![]() for the link.
for the link.
Associated work items in build
The build summary page shows work items linked to Git commits under Associated work items.

Supported link types
Links appear in the Development section when you:
- Create a branch, commit, or pull request from the work item
- Reference the work item ID in a commit, pull request, or other Git or TFVC operation
- Manually add a link from the Development section or Links
 tab
tab
Supported link types include Branch, Build, Changeset, Commit, Found in build, Integrated in build, Pull Request, and Versioned Item.
Tip
Integrated in build also works for GitHub repositories with YAML pipelines. For more information, see View build status for YAML pipelines.
![]()
Use AI to link work items to development
If you connect the Azure Boards MCP Server to your AI agent in agent mode, you can use natural language prompts to manage links between work items and development objects.
| Task | Example prompt |
|---|---|
| Link a work item to a PR | Add a pull request link from user story #234 to pull request #567 |
| Find linked work items | Show me all work items that have pull request links in the current sprint |
| Check development status | List all user stories in the Active state that don't have any development links |
| View links for a work item | Show me all links for work item #890, including commits and pull requests |
| Find unlinked PRs | Which open pull requests in the FabrikamFiber repo aren't linked to any work item? |
| Summarize recent commits | Summarize the commits linked to bug #452 and tell me if the fix looks complete |
| Trace a feature end-to-end | Show me every branch, PR, and build linked to feature #100 and its child user stories |
Note
Agent mode and the MCP Server use natural language, so you can adjust these prompts or ask follow-up questions to refine the results.